** nest js sample 링크에서 어떻게 사용하는지 참조 가능
1. 터미널에서 git clone + 해당 코드 주소(https://github.com/nestjs/nest.git) 넣고
그리고 cd nest/ => cd sample/ => code .
let num_list:number[] = [1,2,3]
let myName = "dahan"
타입을 지정안해도 알아서 string으로 파악되지만
보통 대부분 ts를 사용하는 사람들은
let myName:string = "dahan"이런식으로 지정해서 사용 함
타입스크립트 사용하려면
npm i -g typescript
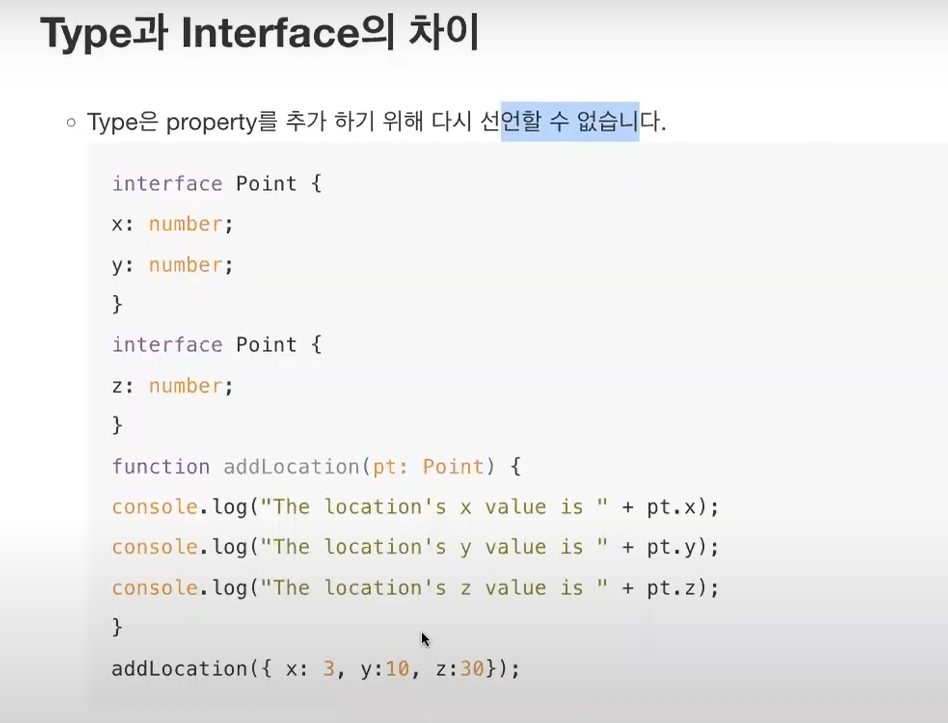
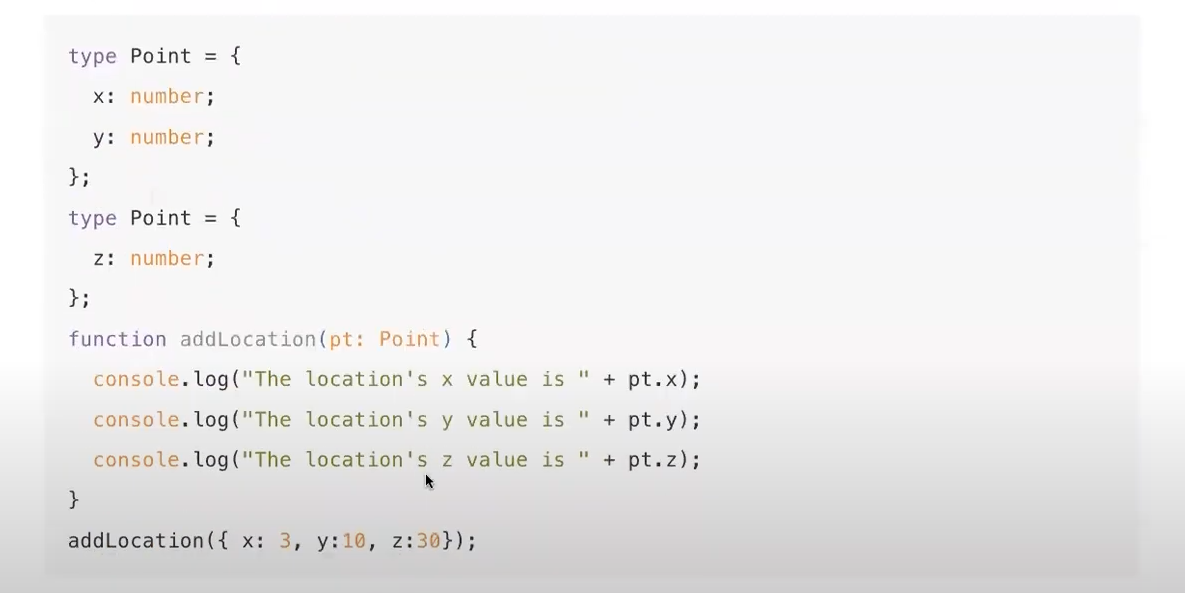
* Interface는 추가하기 위해 다시 선언 가능
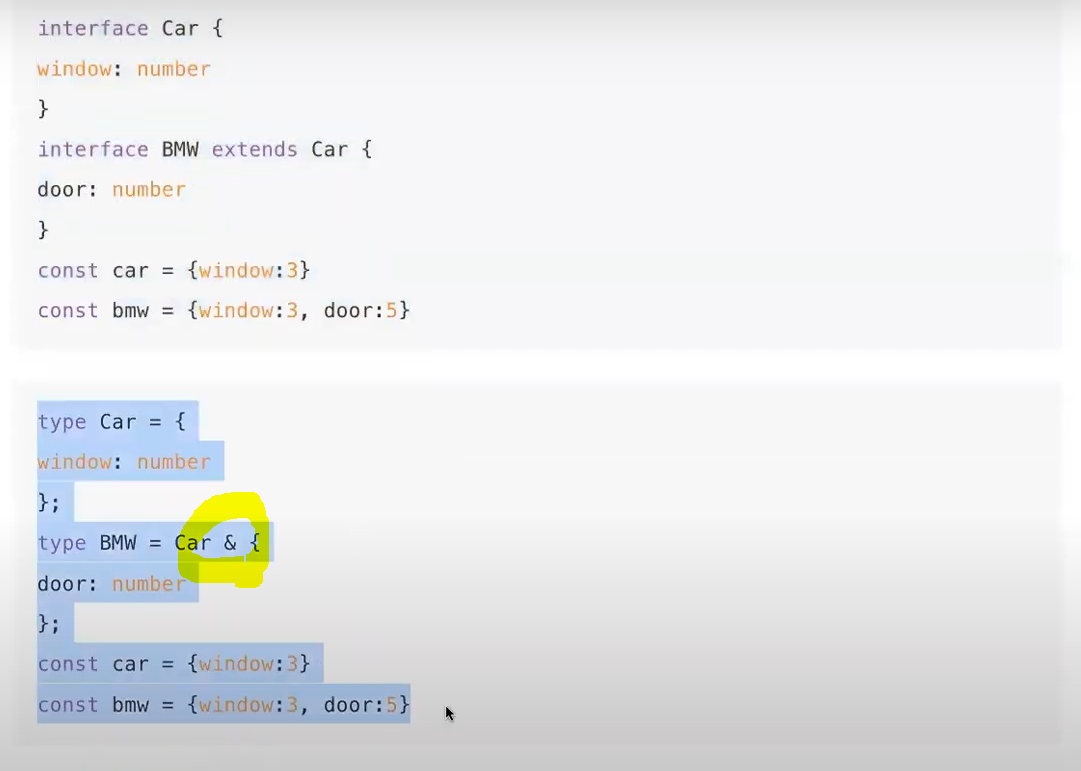
* 상속의 방법이 다름
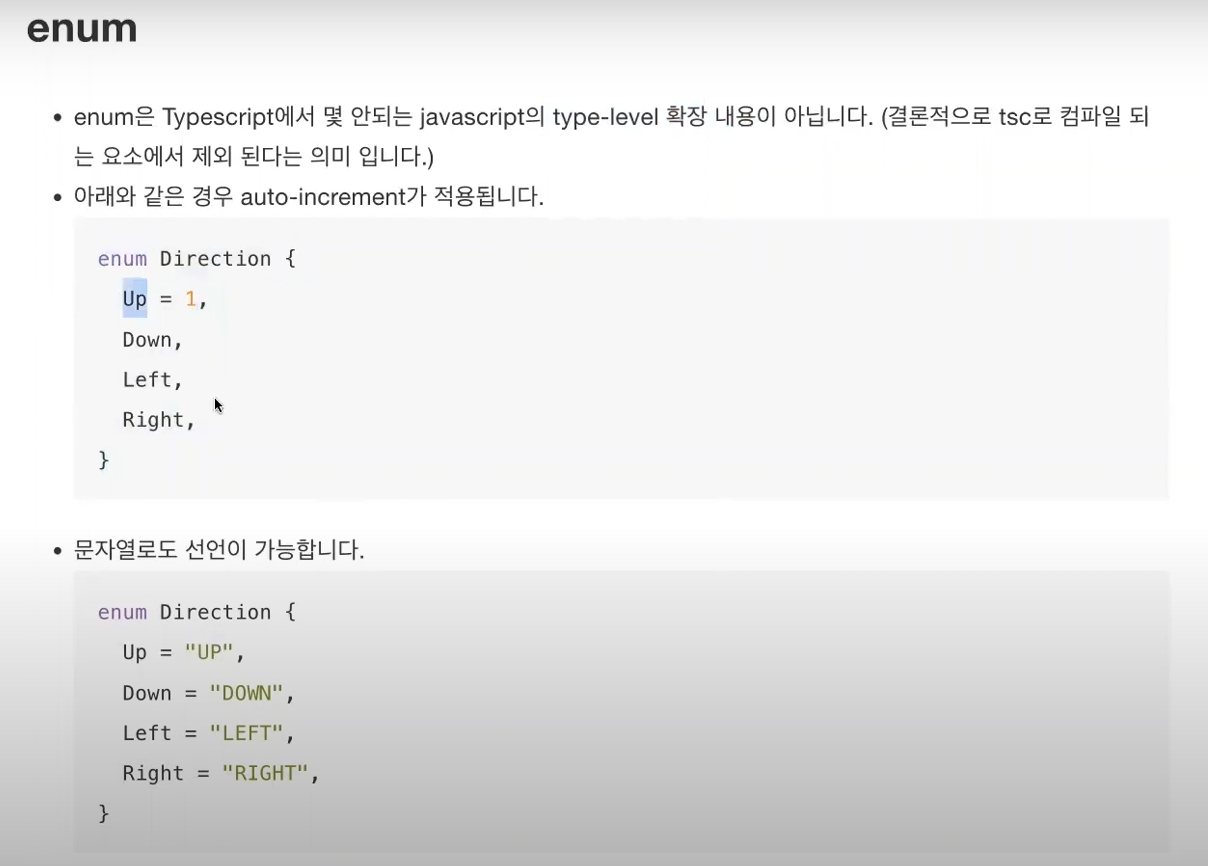
* enum
* 함수 ( 잘 이해 안 감 / 다시 이해하기 32:20)
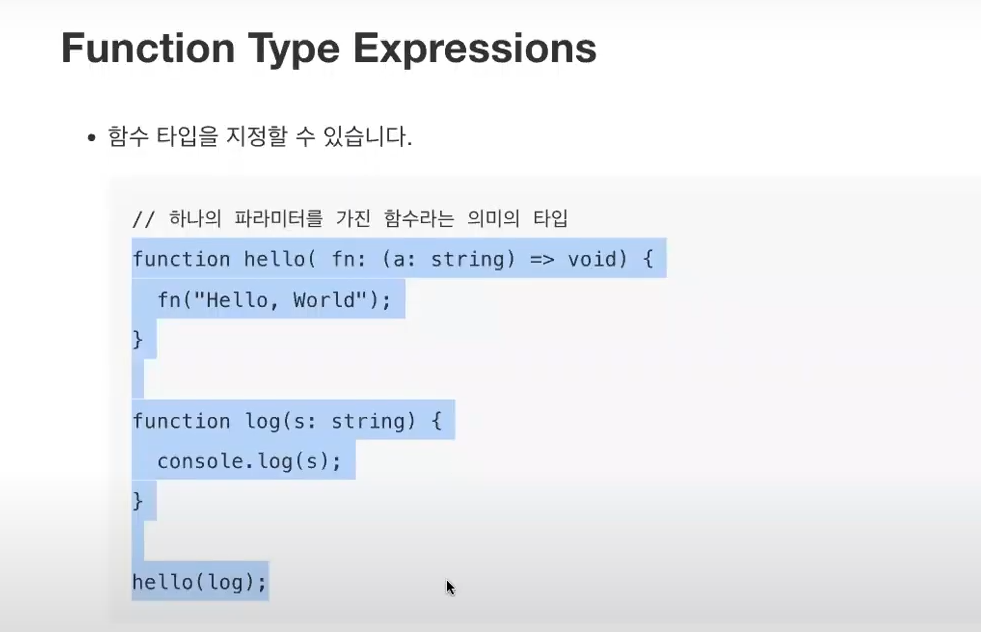
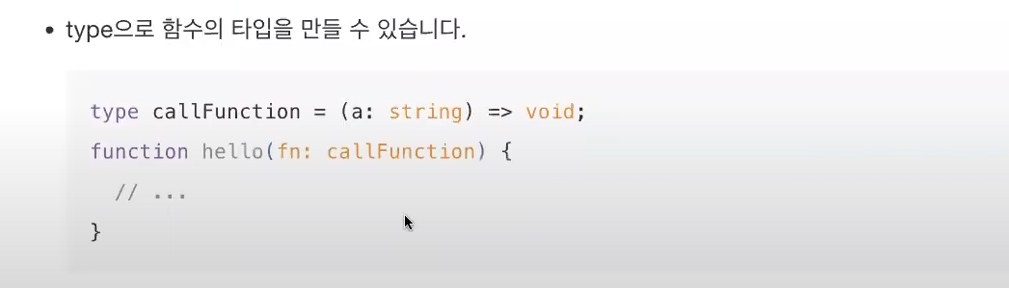
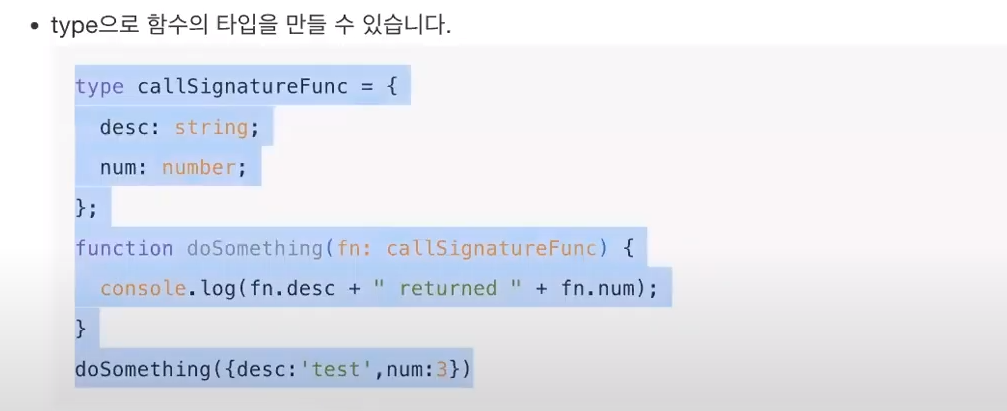
* call signature
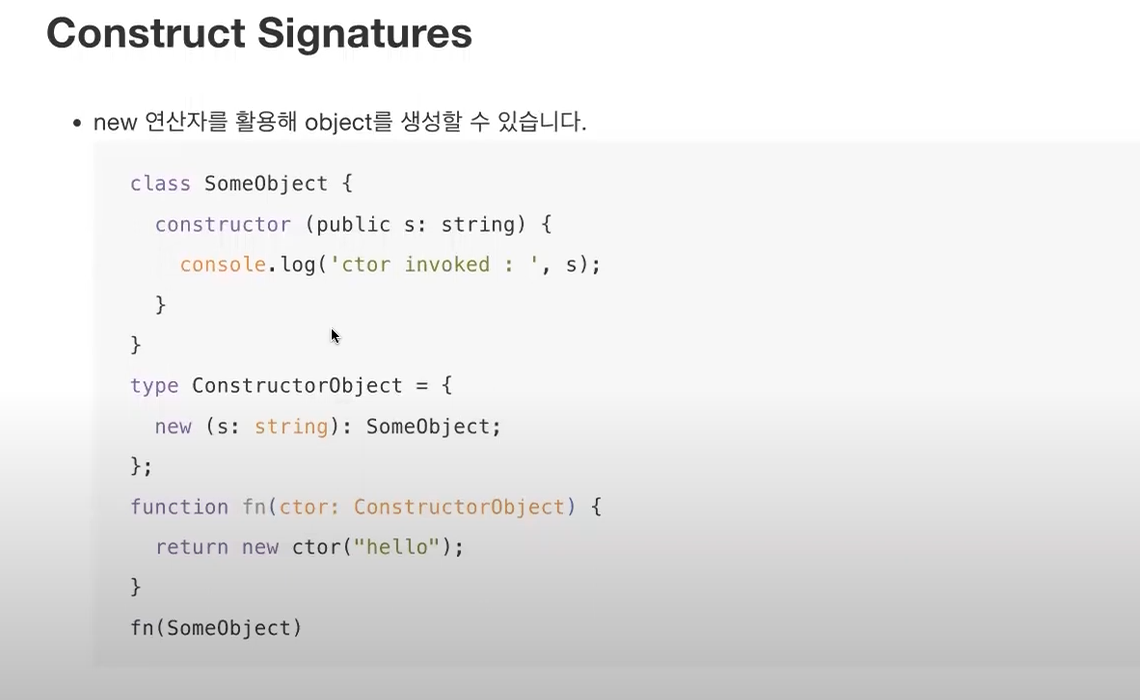
* Construct Signatures
* Class
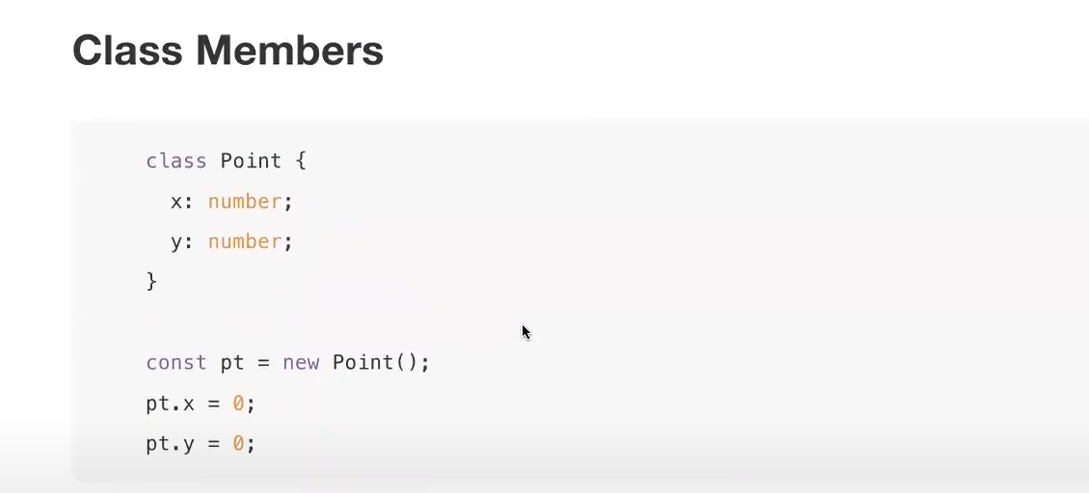
console.log(pt)
= 결과값 : Point { x: 0, y: 0 }

console.log(`${pt.x}, ${pt.y}`);
= 결과값 : 0, 0
* 생성자 활용
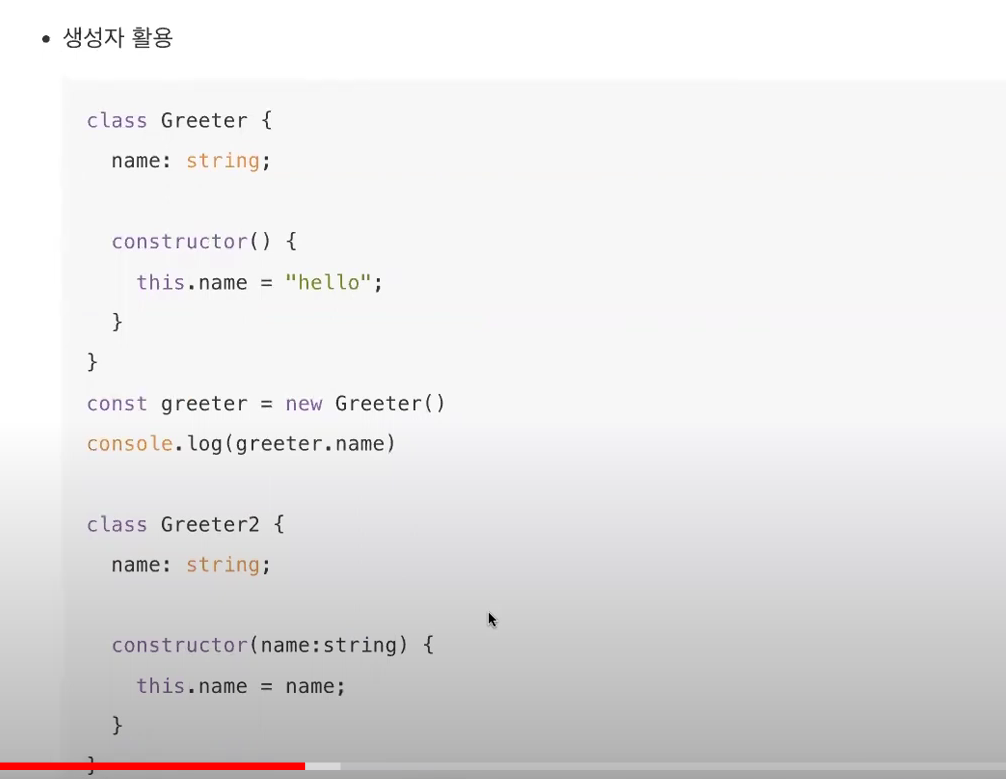
= 결과값: hello
* super call

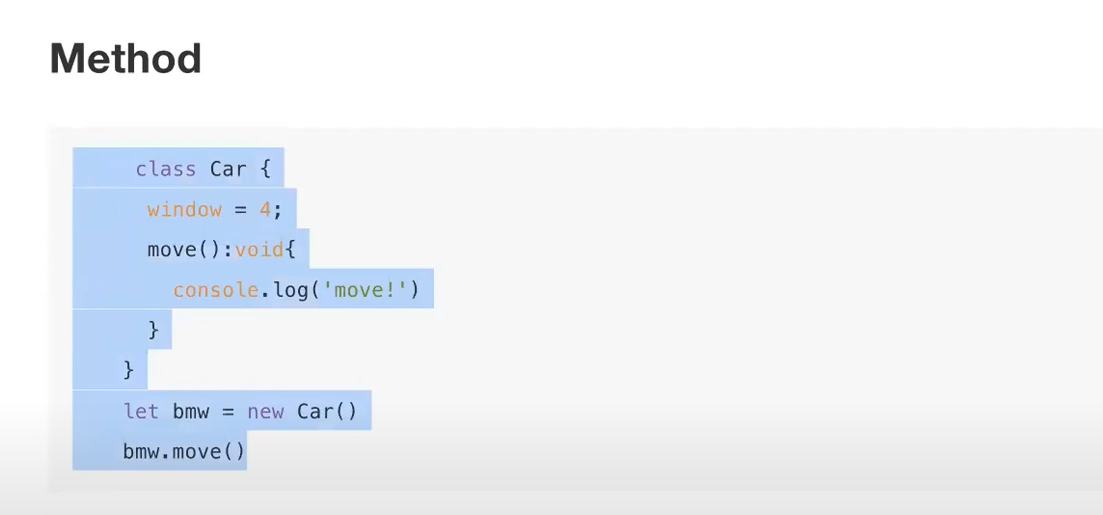
* Method
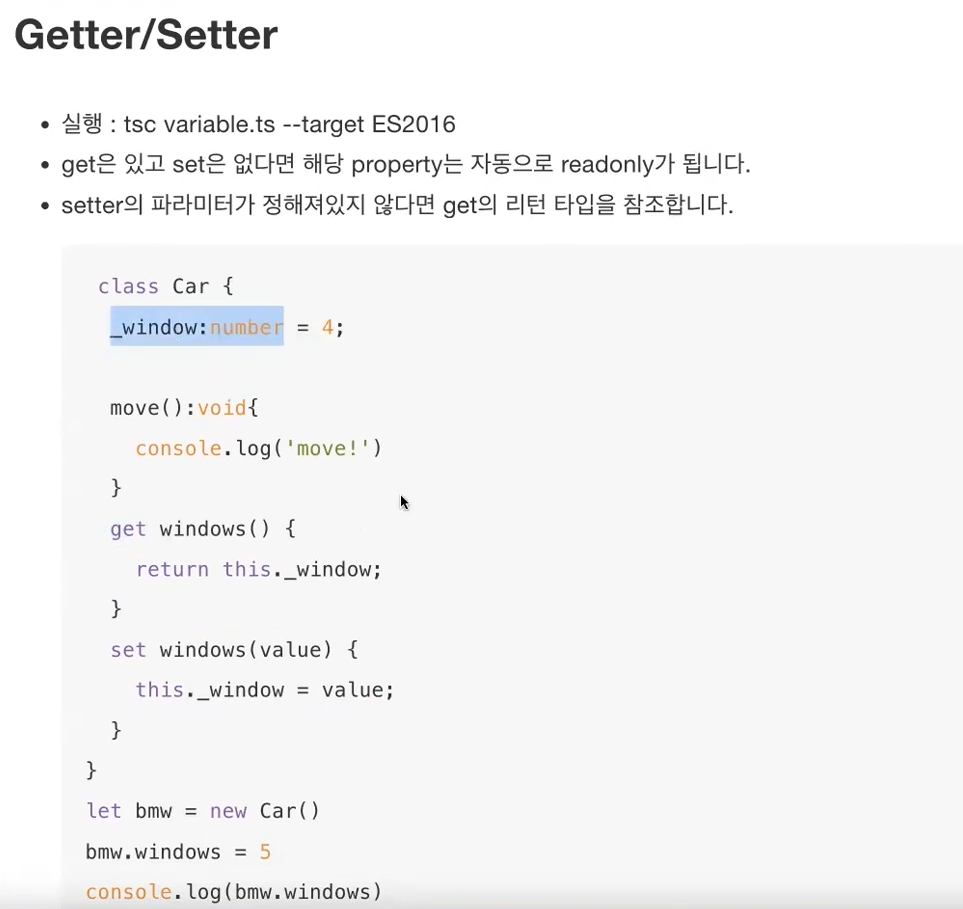
* Getter/Setter
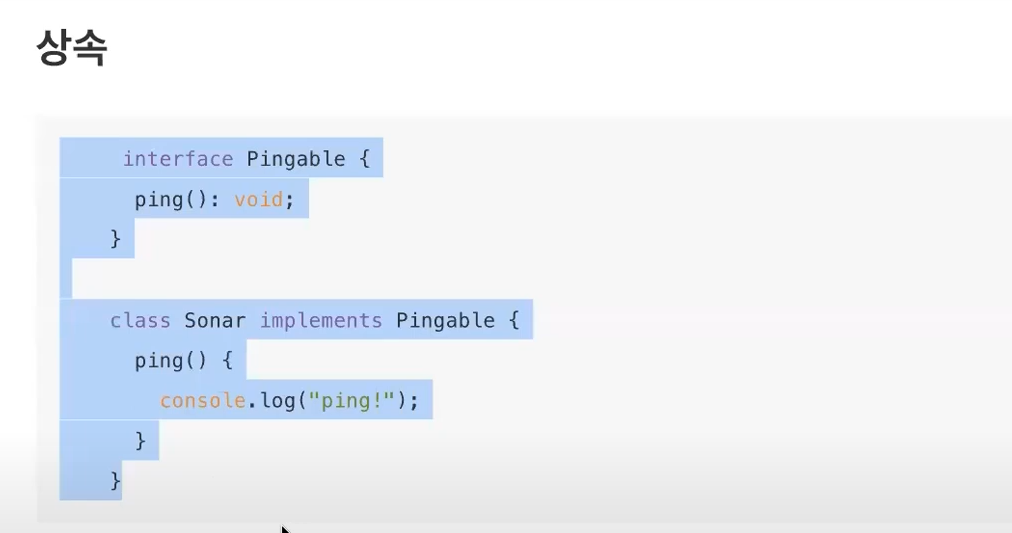
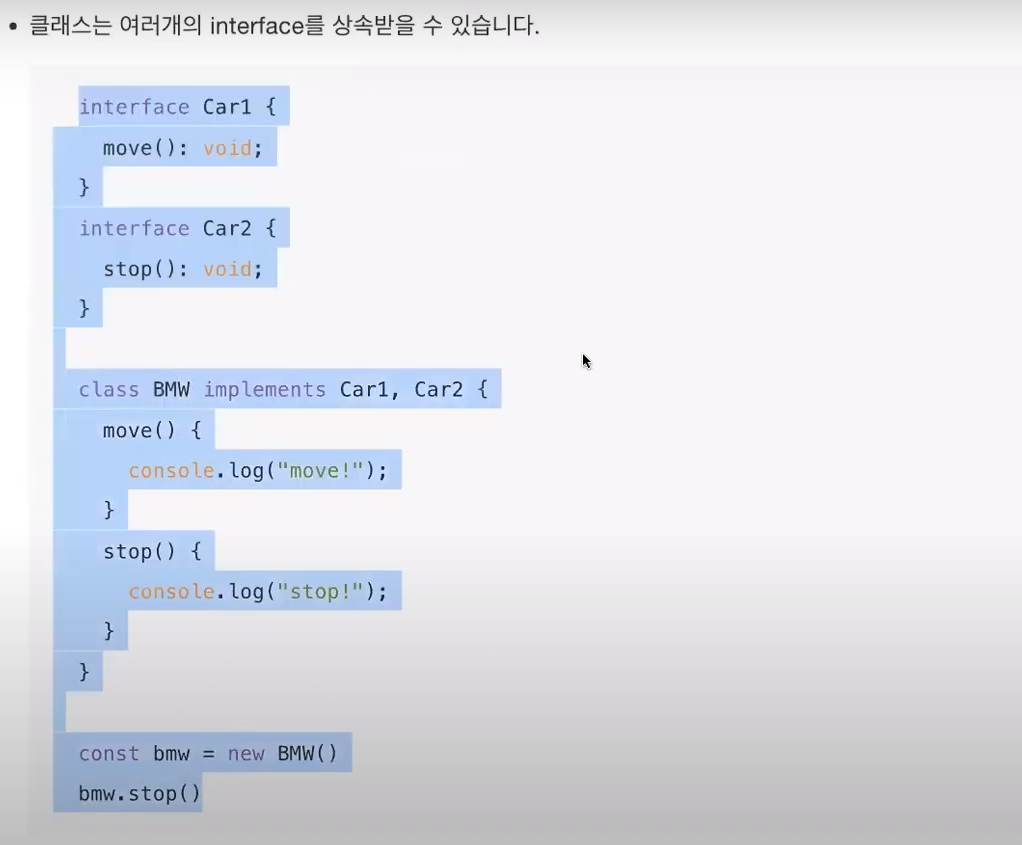
* 상속
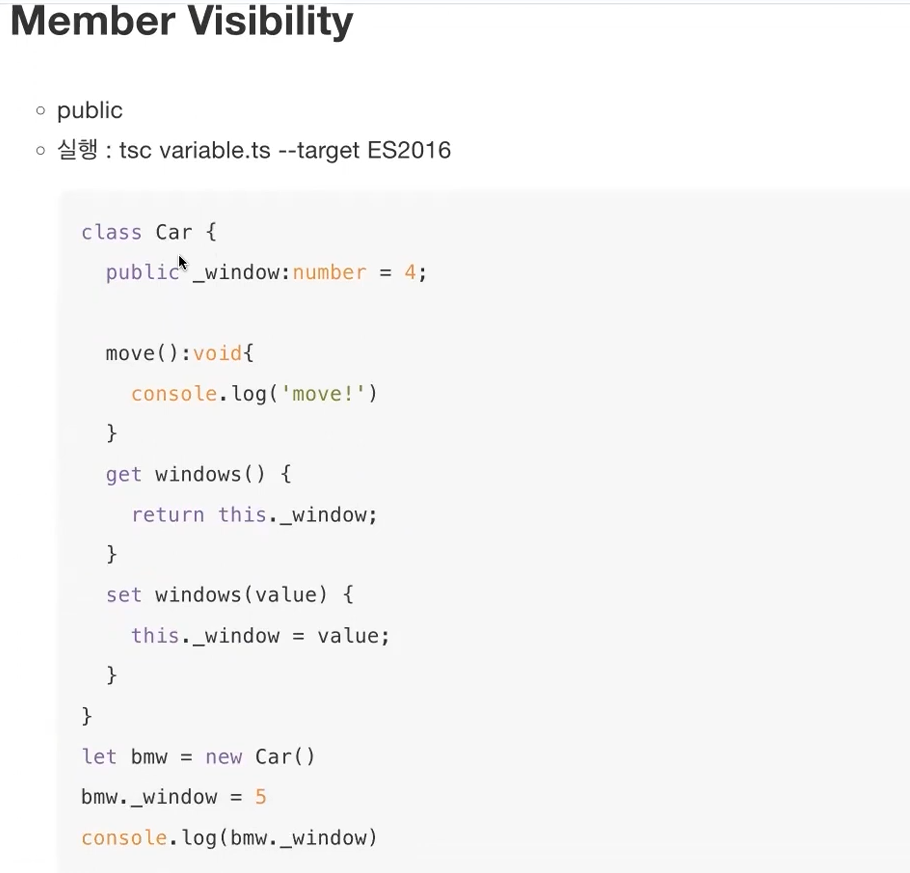
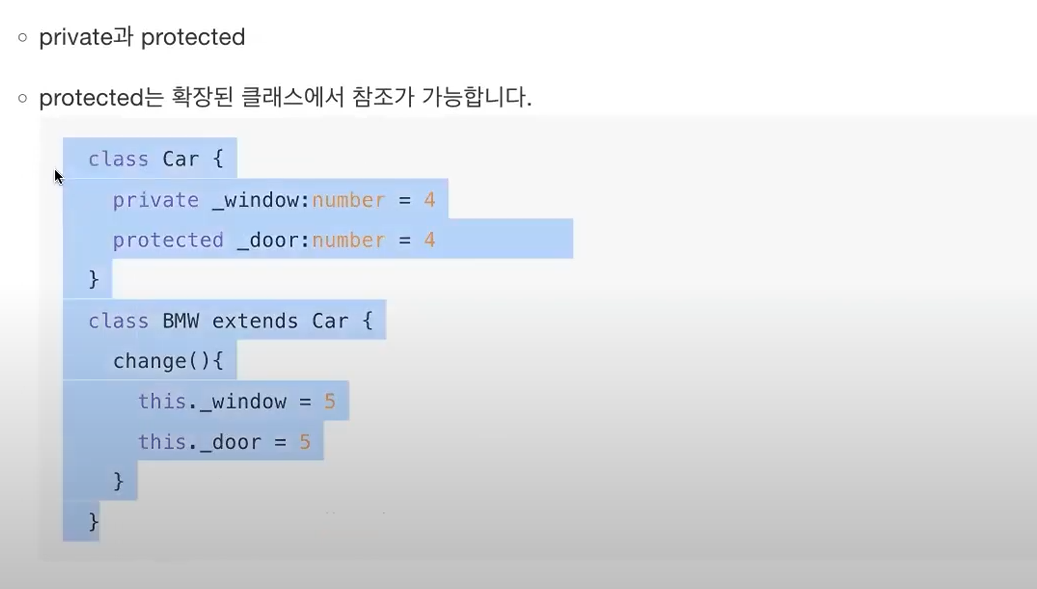
* Member Visiblity
* Controller
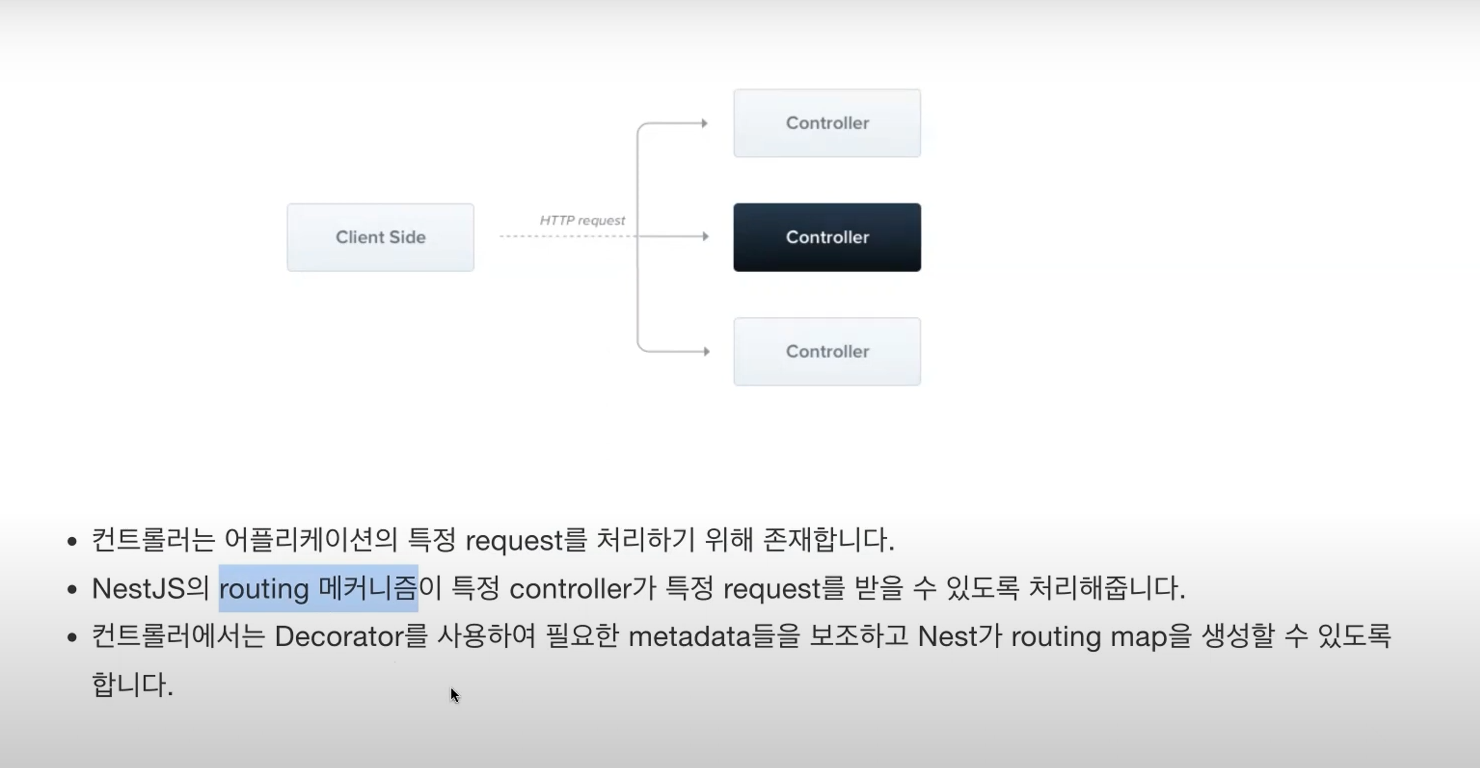
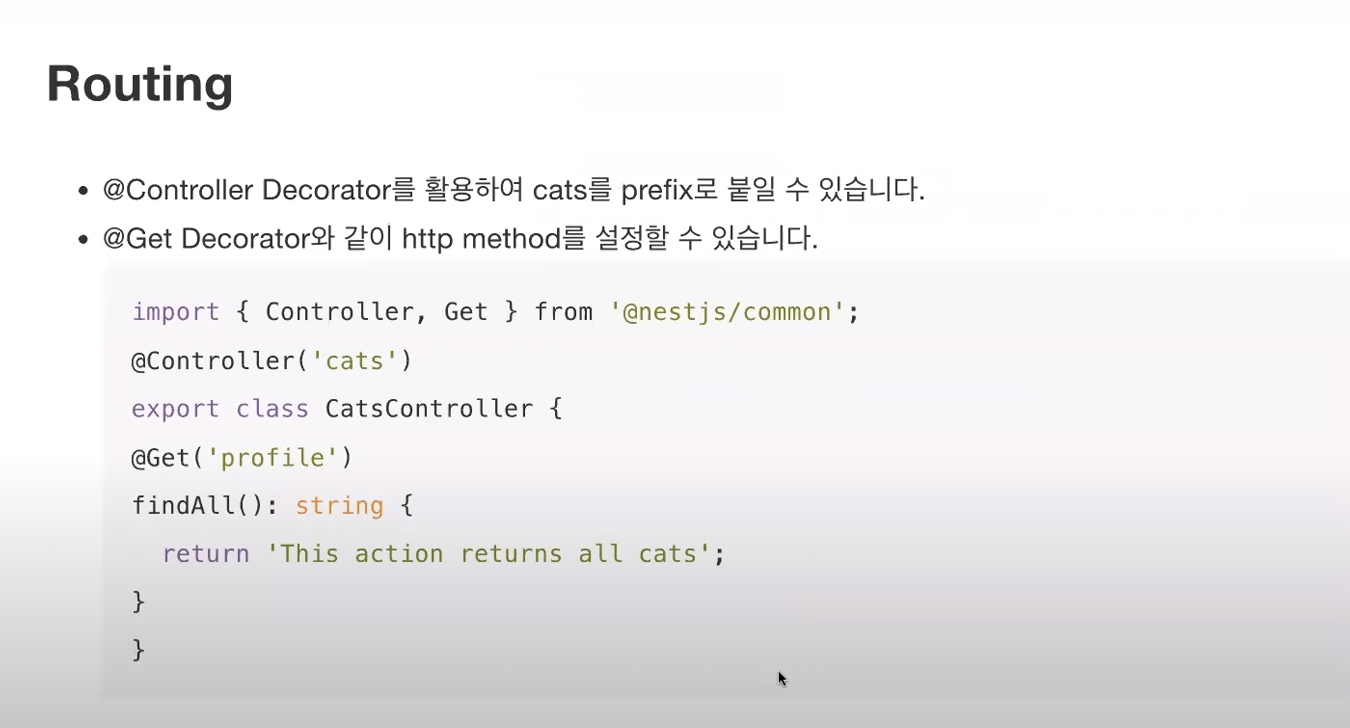
* Routing
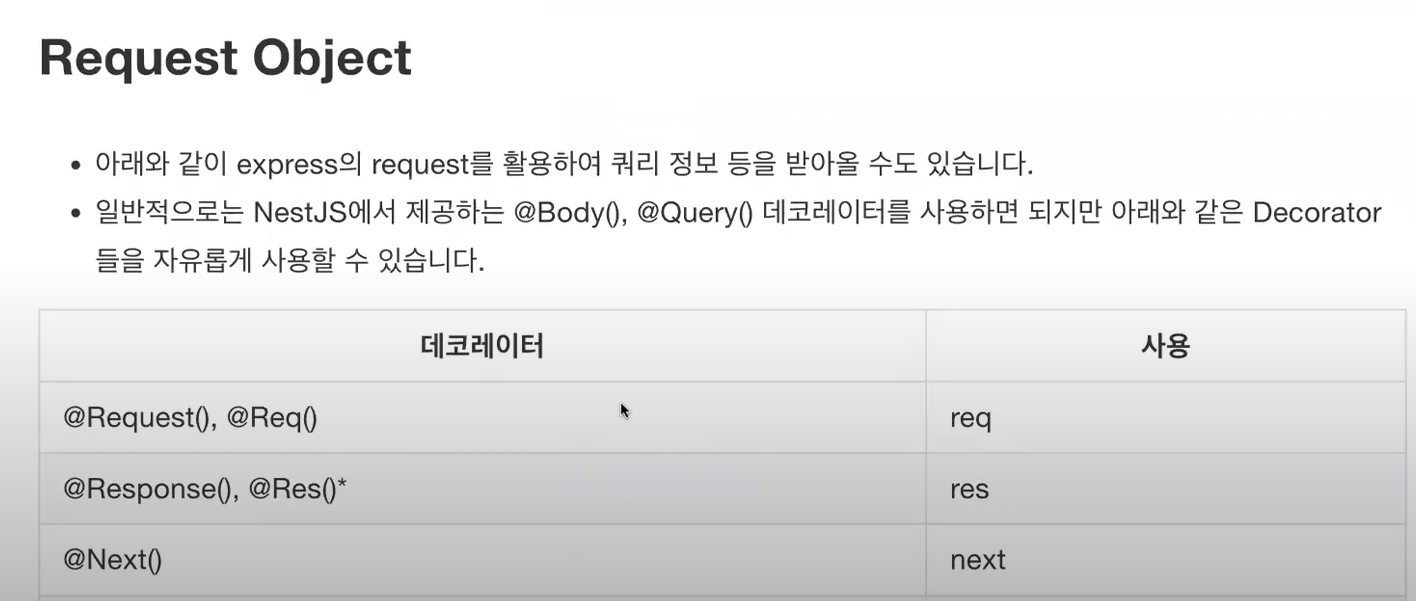
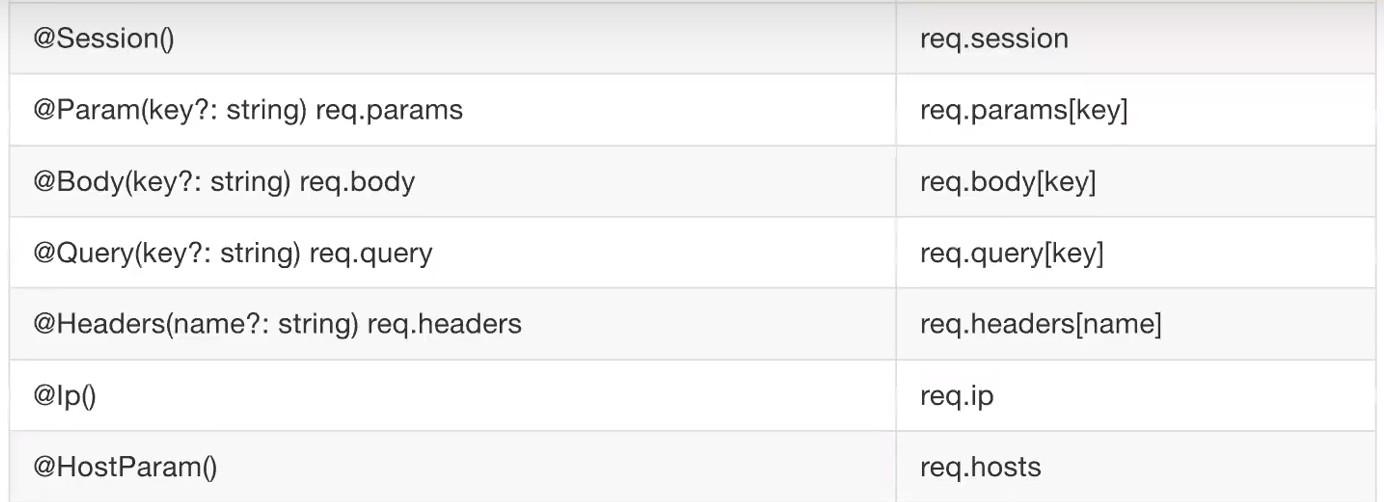
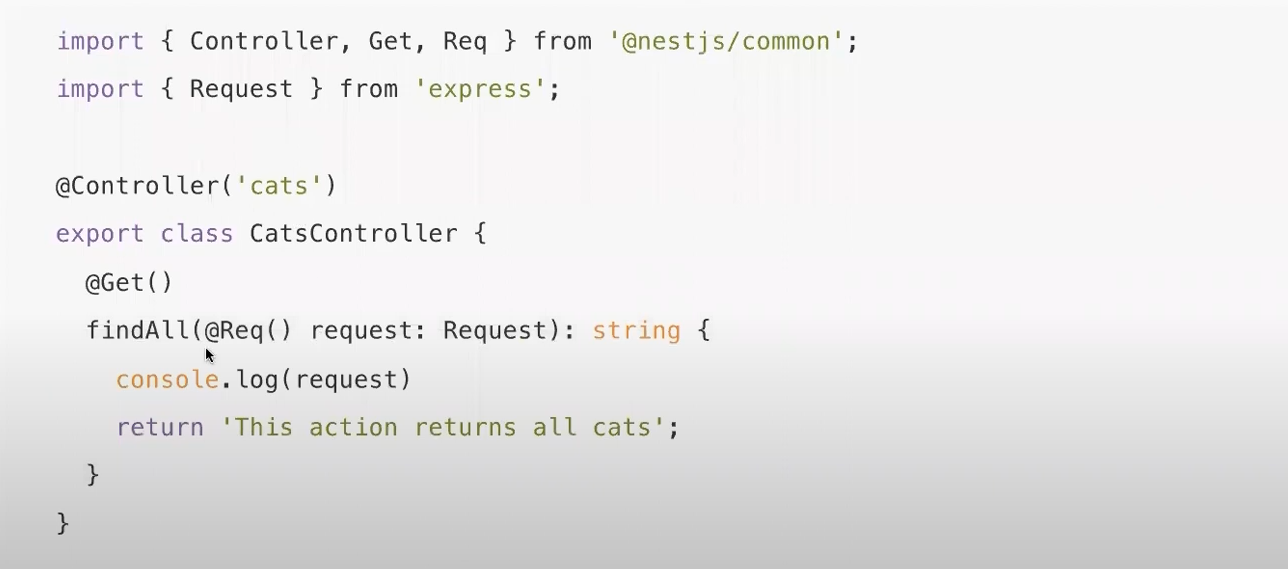
* Request Object
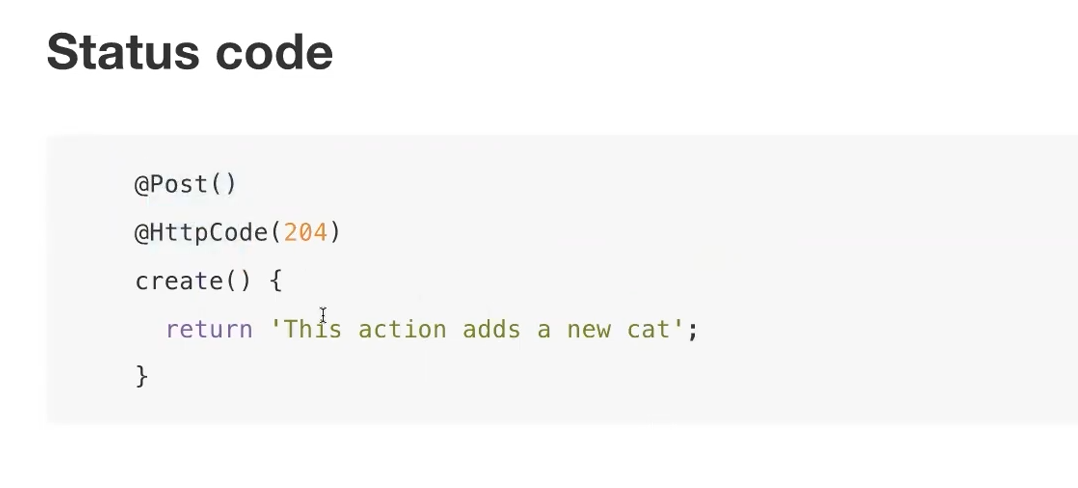
* Status code
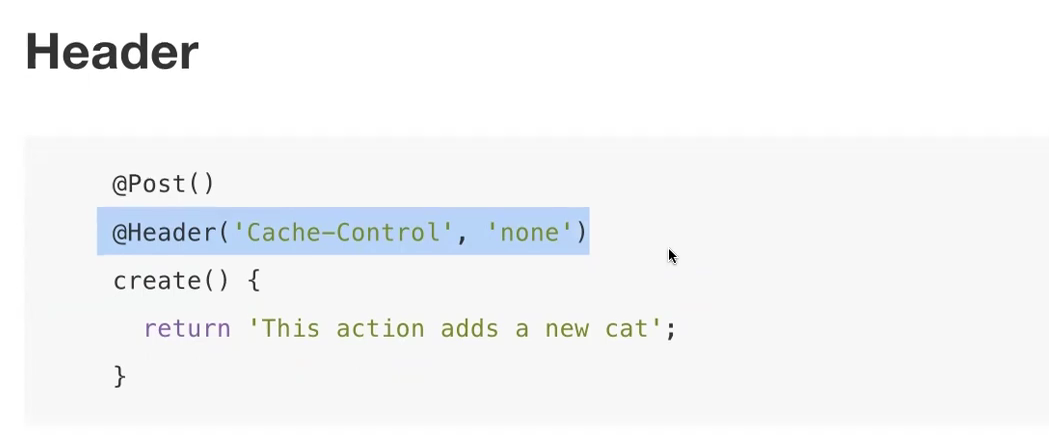
* Header
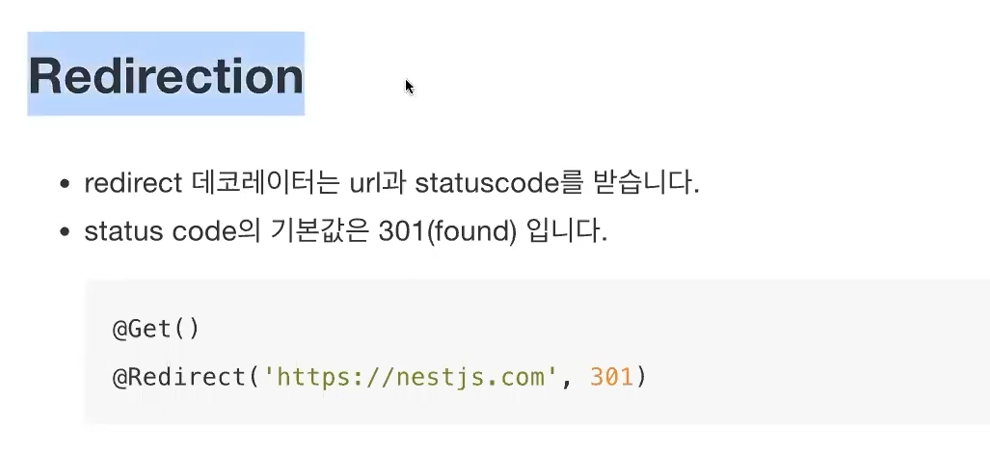
* Redirection
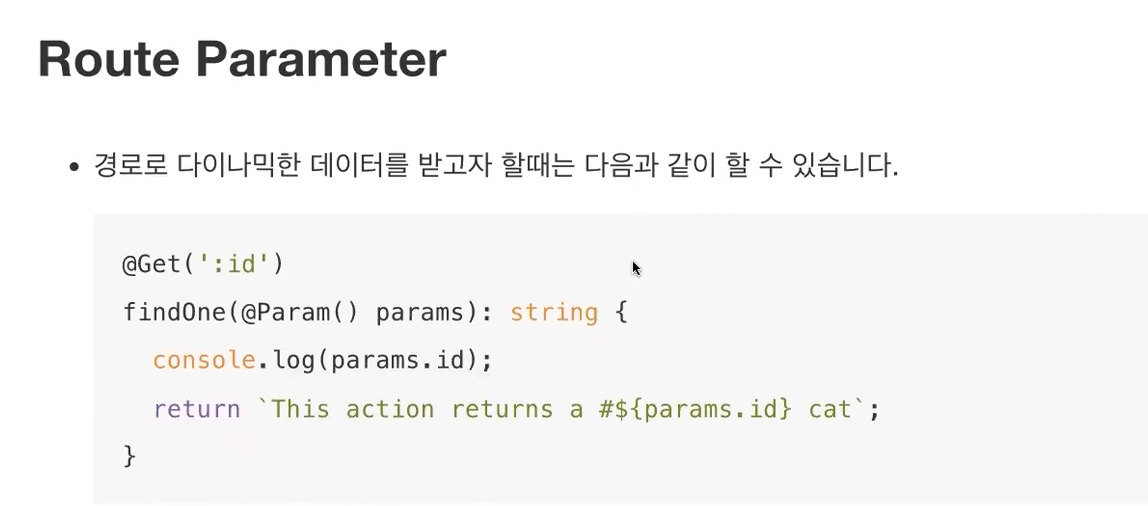
* Route Parameter
---------------------------------------------------------------------------------------------------------------Controller 끝
* Provider
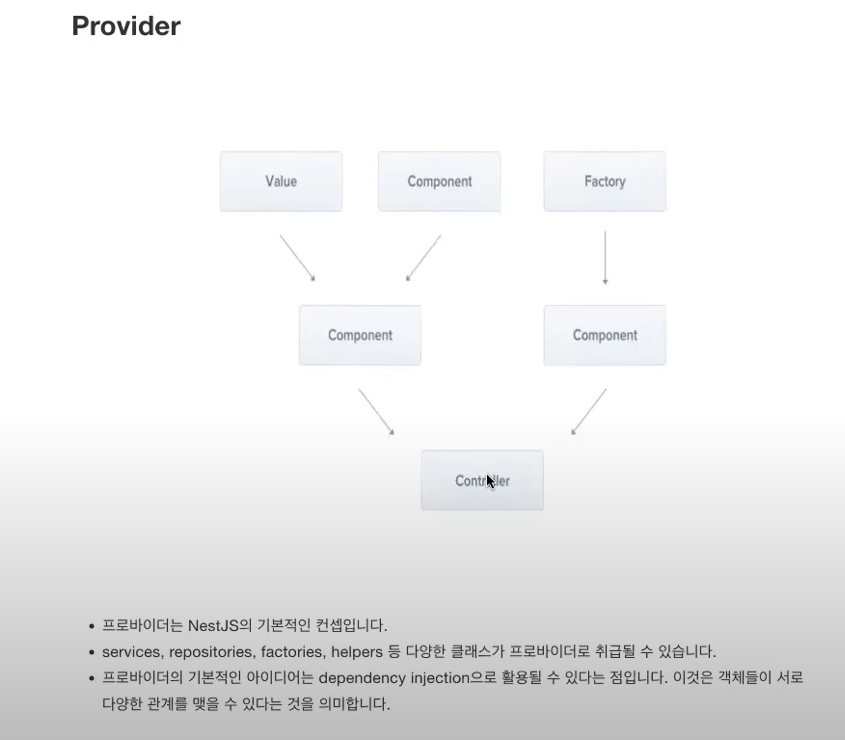

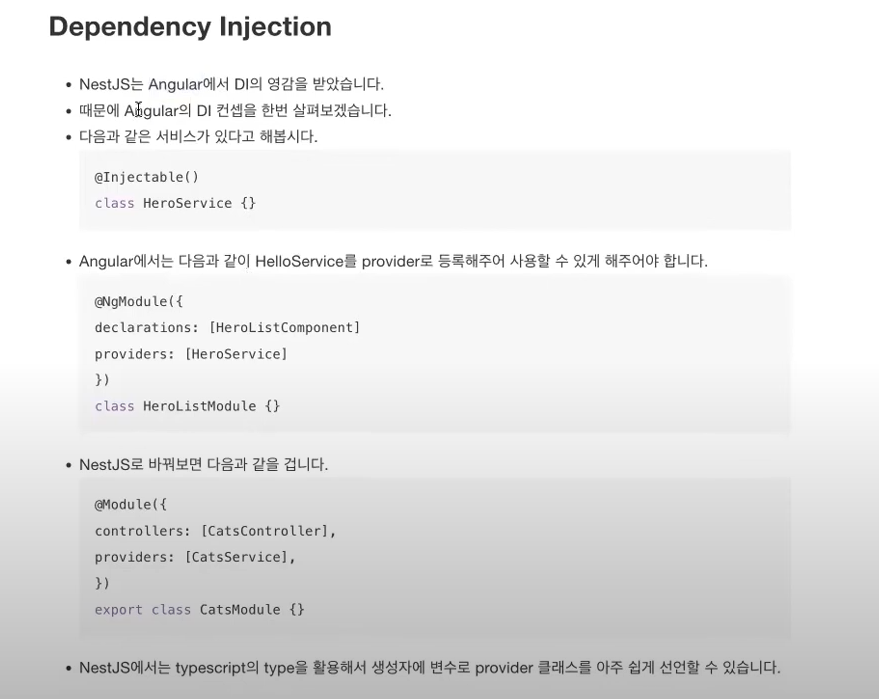
* Dependency Injection
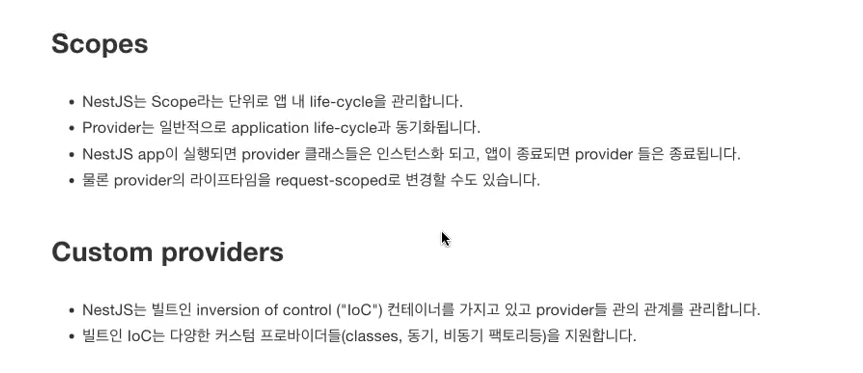
* Scopes / Custom Providers
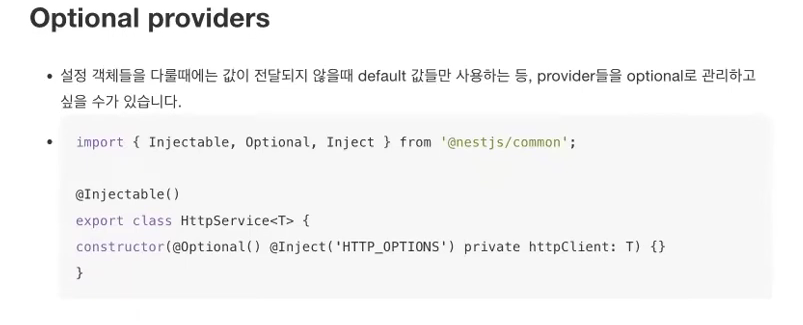
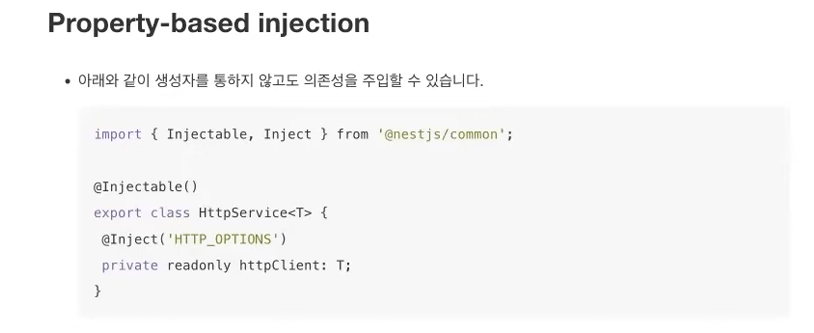
* Property-based injection
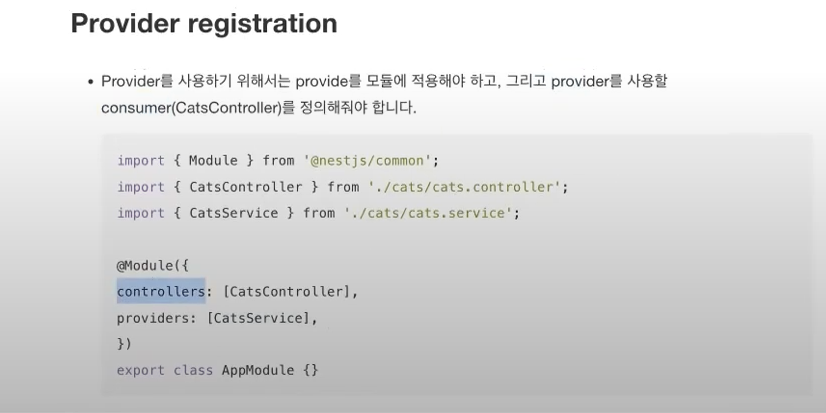
* Provider registration
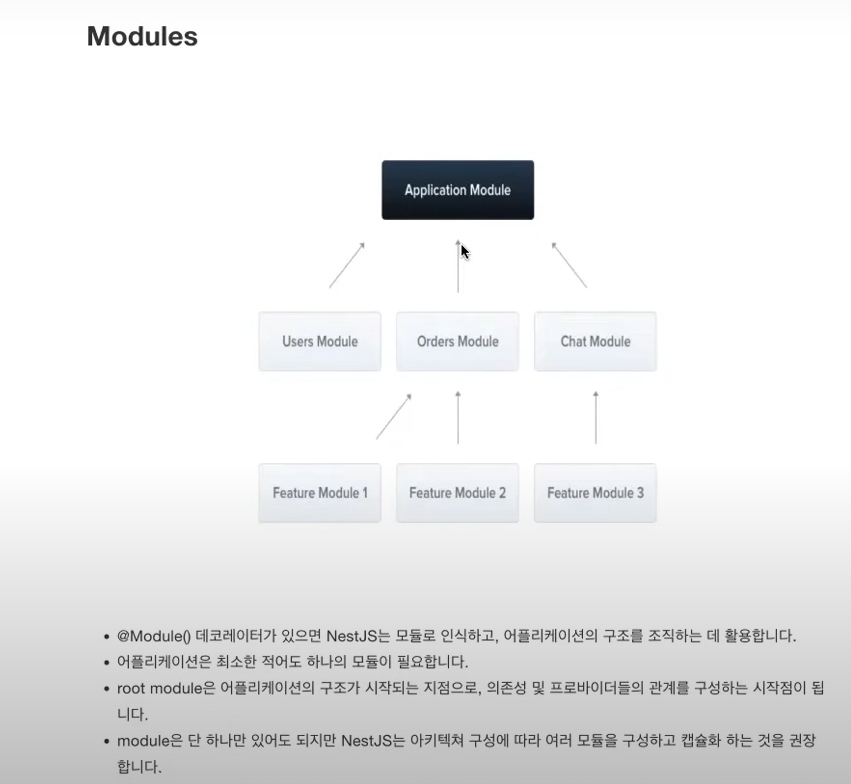
* Modules

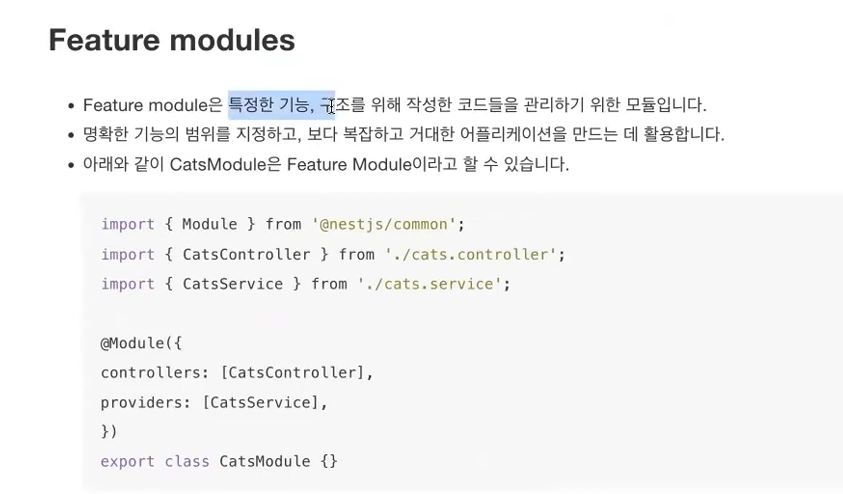
* Feature modules

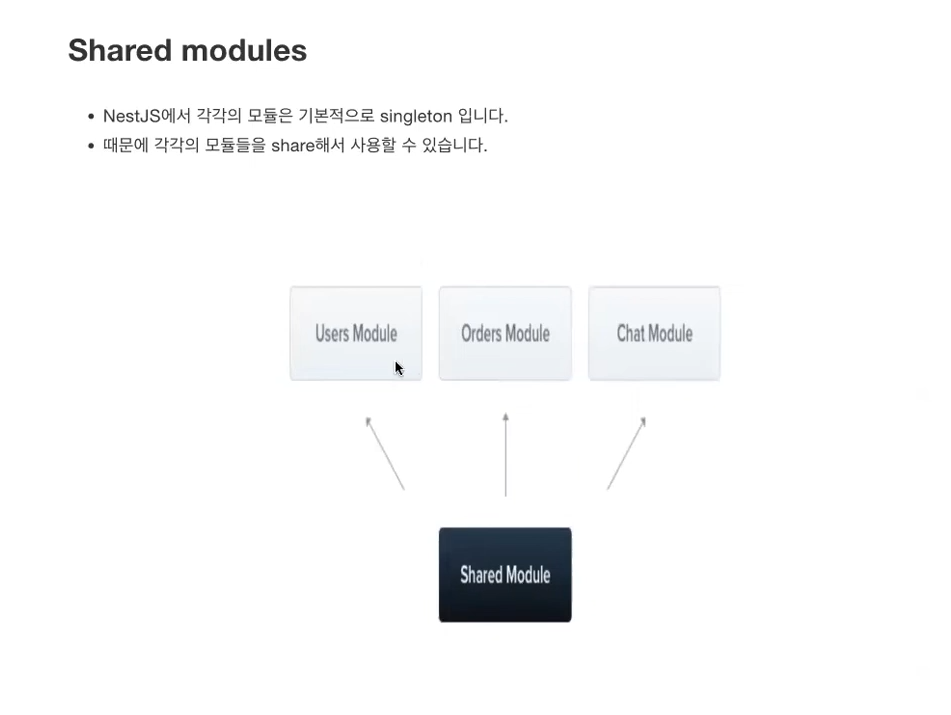
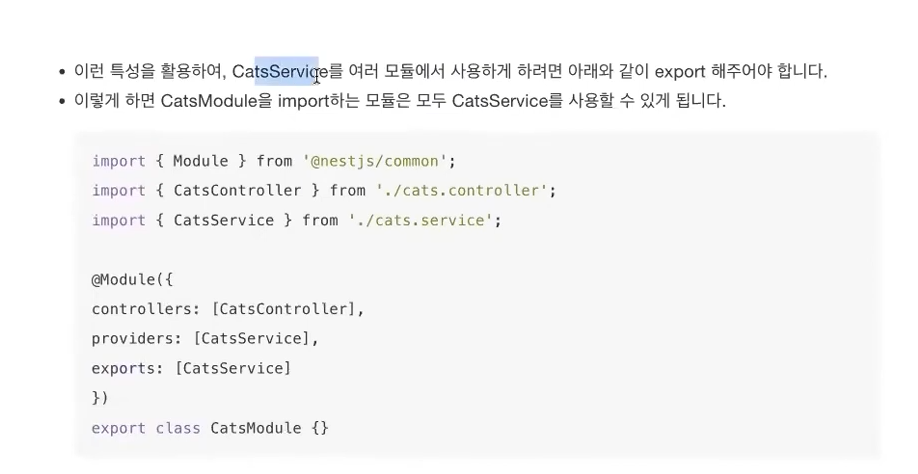
* Shared modules
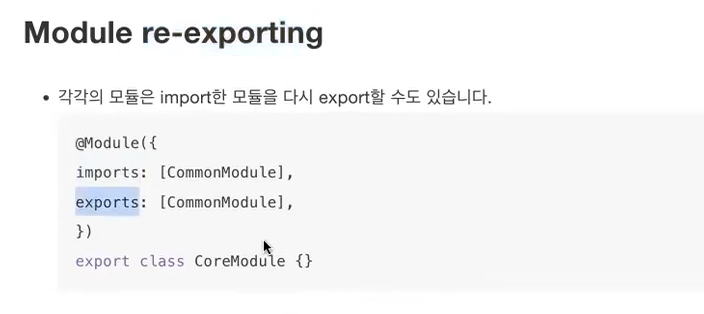
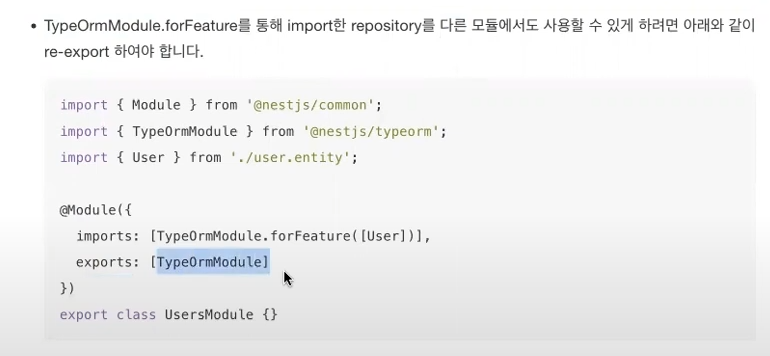
* Module re-exporing
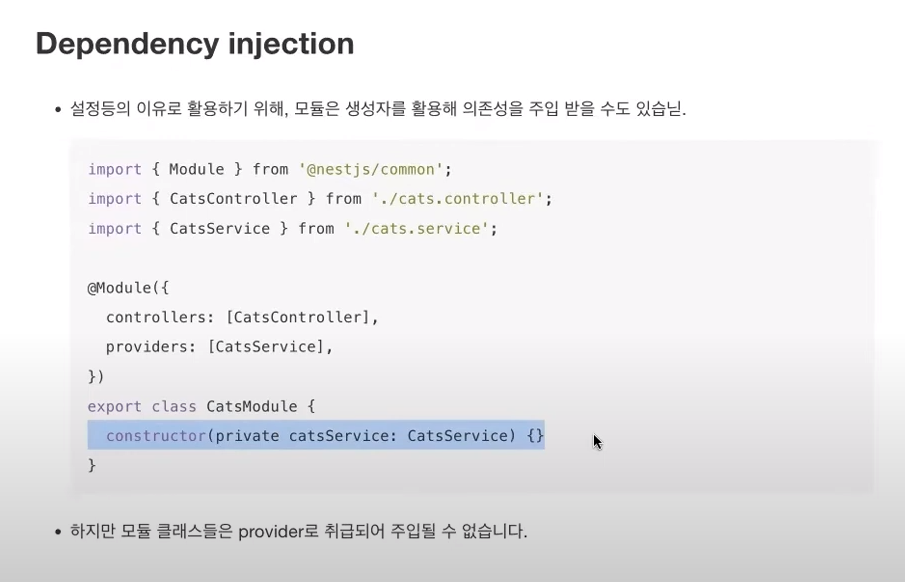
* Dependency injection (보통 사용 많이 안함)
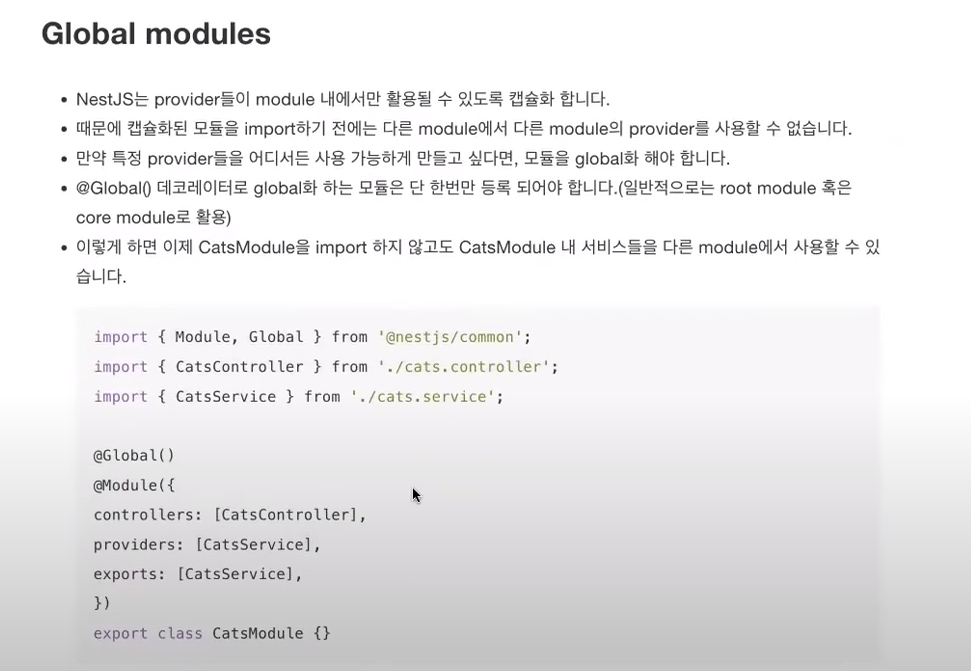
* Global Modules
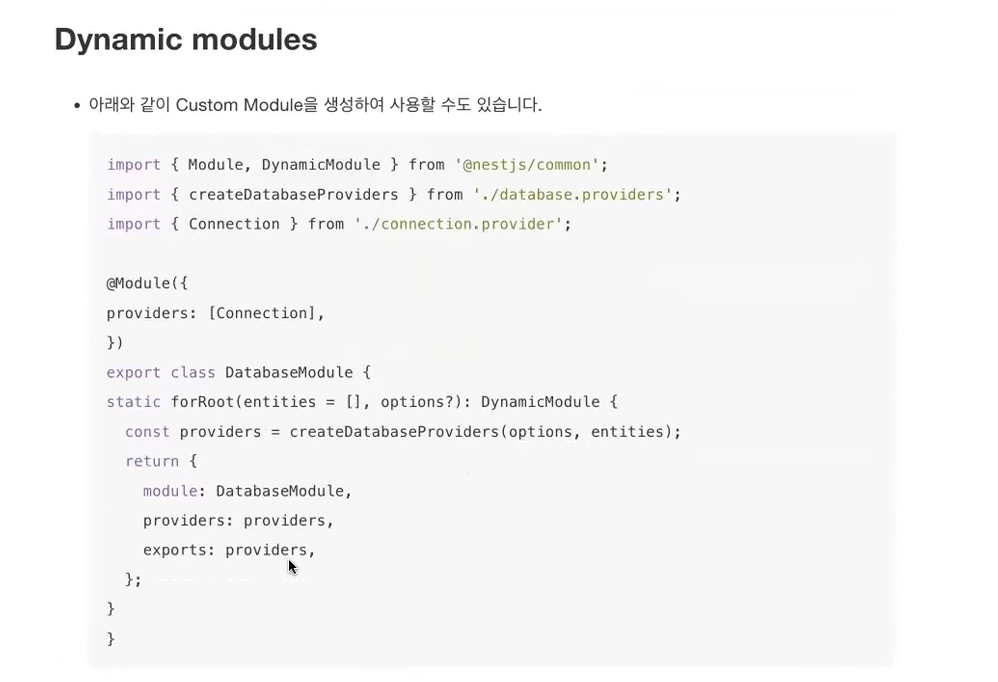
* Dynamic modules
--------------------------------------------------------------------------------Module 끝
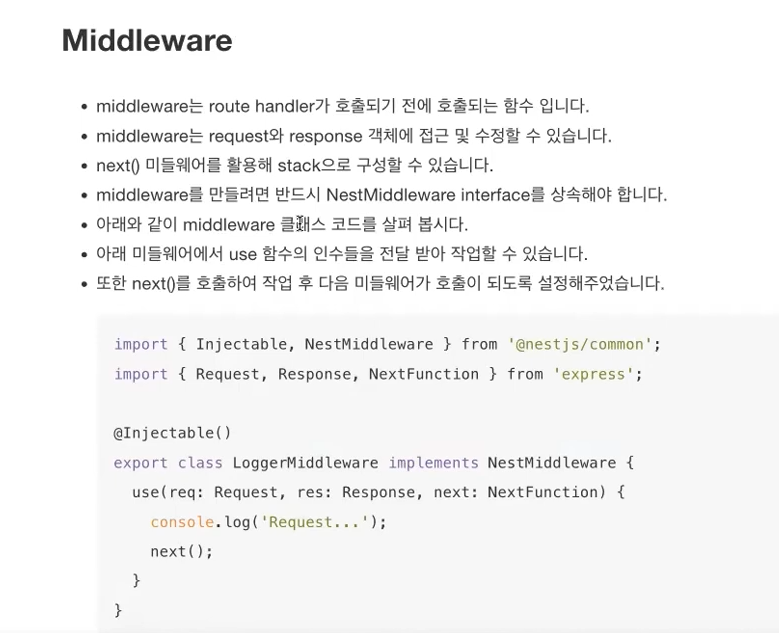
** Middleware
* Applying middleware
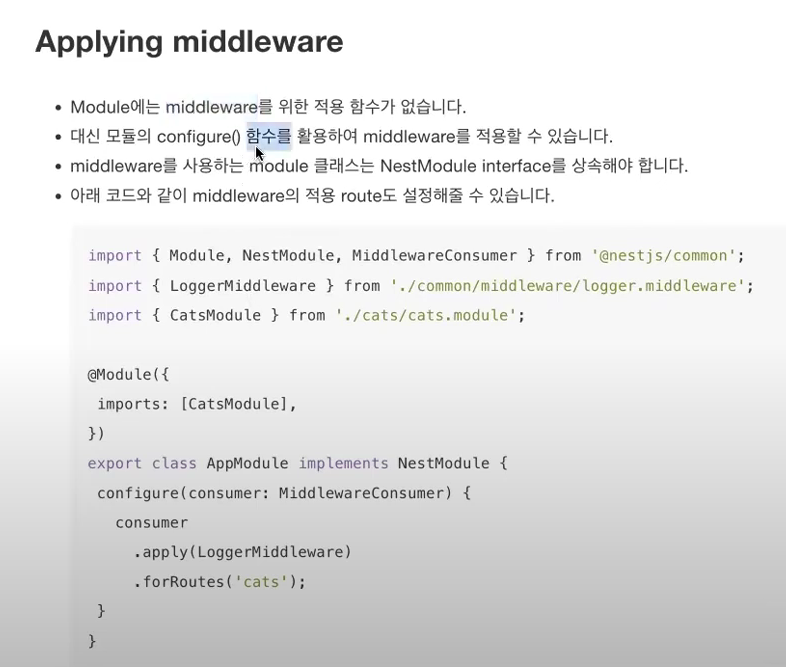
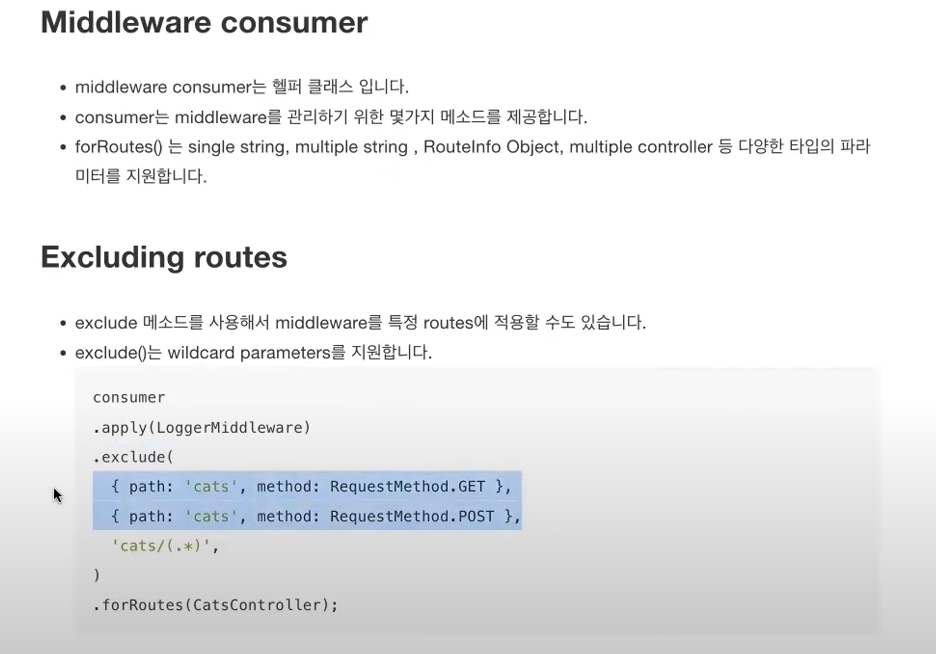
* Middleware consumer
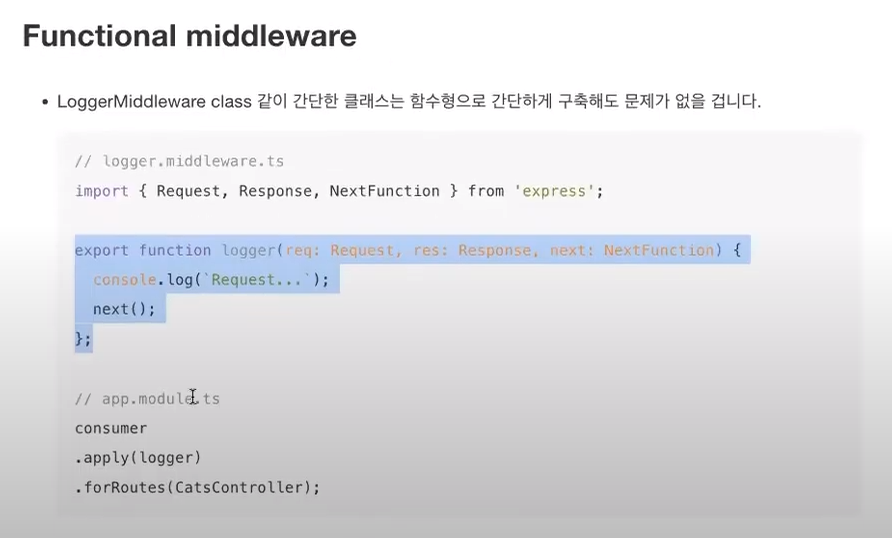
* Functional middleware
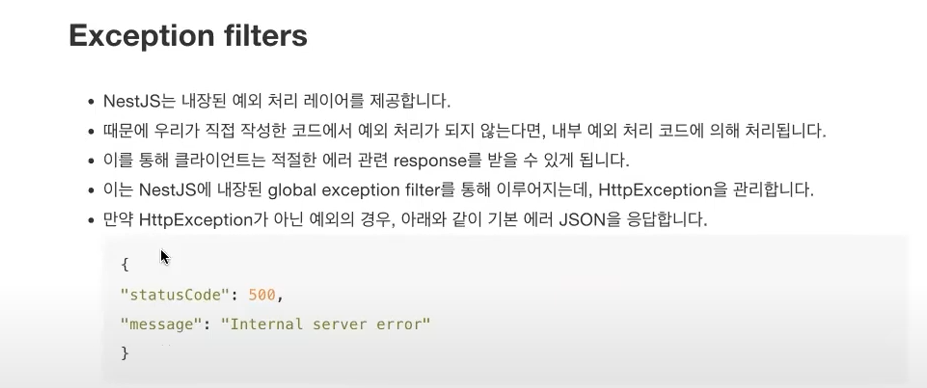
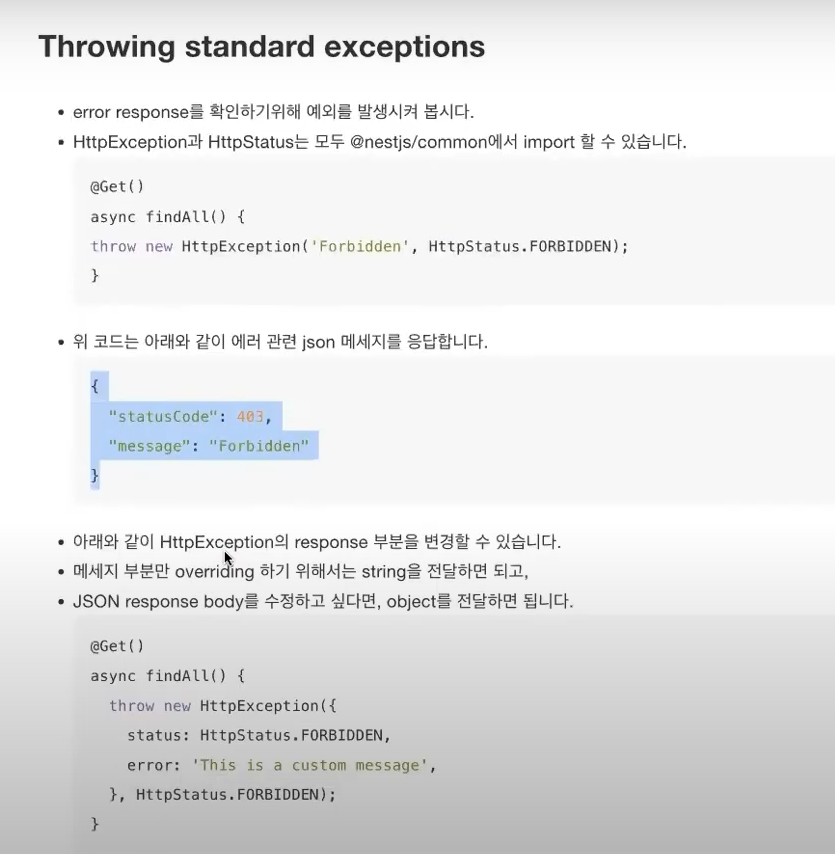
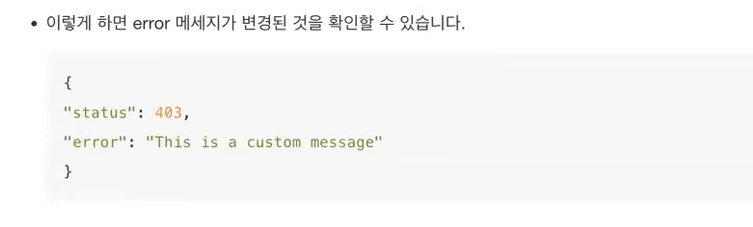
* Exception filters
* Throwing standard exceptions
--------------------------------------------------------------------------------------------------------------
** Simple API 생성
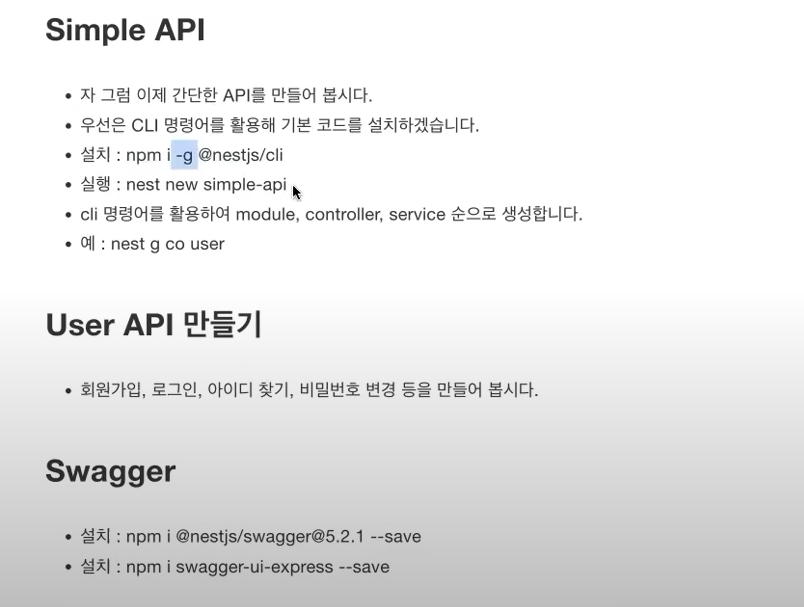
* Nest generate (링크 참조)

* bcrypt 란? (링크 참조)
- 단방향 암호화를 위해 만들어진 해시 함수로서 현업에서 가장 많이 사용되는 패스워드 암호화 알고리즘
* bcrypt 사용 이유? (단방향 암호화 이유?)
- 많은 사용자들은 동일한 ID와 Password를 여러 애플리케이션에서 사용하기에 서버 DB에 암호화 없이 비밀번호를 저장하여 보이게하면 외부적, 내부적으로 둘 다 보안 위험이 발생
- 따라서 비밀번호 암호화를 위해 해시 함수 및 Bcrypt 도입
- 암호화 자체로 데이터의 유출을 막지는 못하지만 데이터에 담긴 정보를 알 수 없게 하는 것이 목적
* bcrypt 구조
- Algorithm : 알고리즘 식별자로서 bcrypt를 의미
- Cost Factor : 키 스트레칭을 한 횟수로서 총 2^n 번인데 그 중 n 숫자를 표시
- Salt : 128 비트로 고정된 솔트값으로 22자의 base64로 인코딩된 값
- Hash : Salting & 키 스트레칭 후의 해시 값
* bcrypt 사용법
터미널
npm i --save bcrypt
* nest js swagger (https://docs.nestjs.com/openapi/introduction)
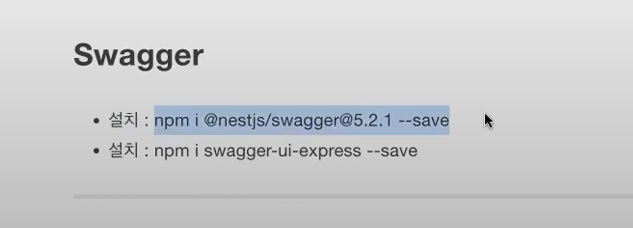
사이트에서 업데이트 된 상태로 입력하면 됨 ( 아래 사진 내용 + swagger-ui-express도 추가로 설치하기)
최신:
npm install --save @nestjs/swagger
npm install swagger-ui-express
이어서
main.tsJS
import { NestFactory } from '@nestjs/core';
import { SwaggerModule, DocumentBuilder } from '@nestjs/swagger';
import { AppModule } from './app.module';
async function bootstrap() {
const app = await NestFactory.create(AppModule);
const config = new DocumentBuilder()
.setTitle('Cats example')
.setDescription('The cats API description')
.setVersion('1.0')
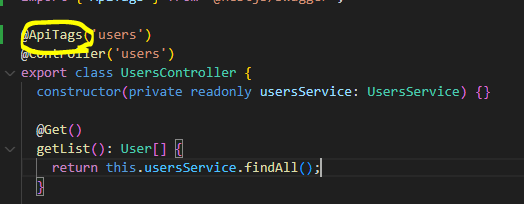
.addTag('cats') -----------------------------<< localhost:3000/api에서 표기되는 이름
.build();
const document = SwaggerModule.createDocument(app, config);
SwaggerModule.setup('api', app, document);
await app.listen(3000);
}
bootstrap();
* Default부분 없애기
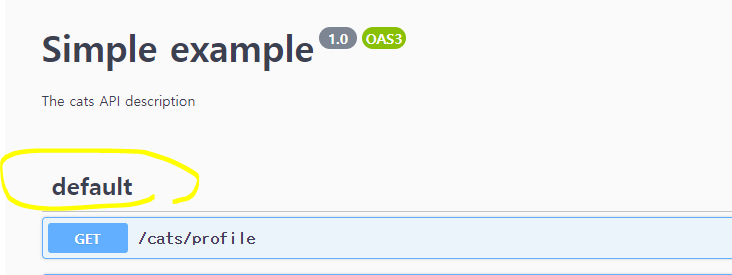
=> 그 외에 swagger에 남아있는 default들은 app.controller.ts에 남아있는 사용하지않는 코드가 남아있어서임
=> 남아있는 코드를 주석처리하면 없어짐
* nest js CRUD 생성
nest g res goods << goods는 폴더 이름임
* 괄호 안에 +id => +를 앞에 넣으면 숫자라는 의미로 사용.
 @Get(':id')
  findOne(@Param('id') id: string) {
    return this.goodsService.findOne(+id);
  }
** 배열의 길이 구하기
만약 const users = [1,2,3] 이라면
users.length는 3이 됨.
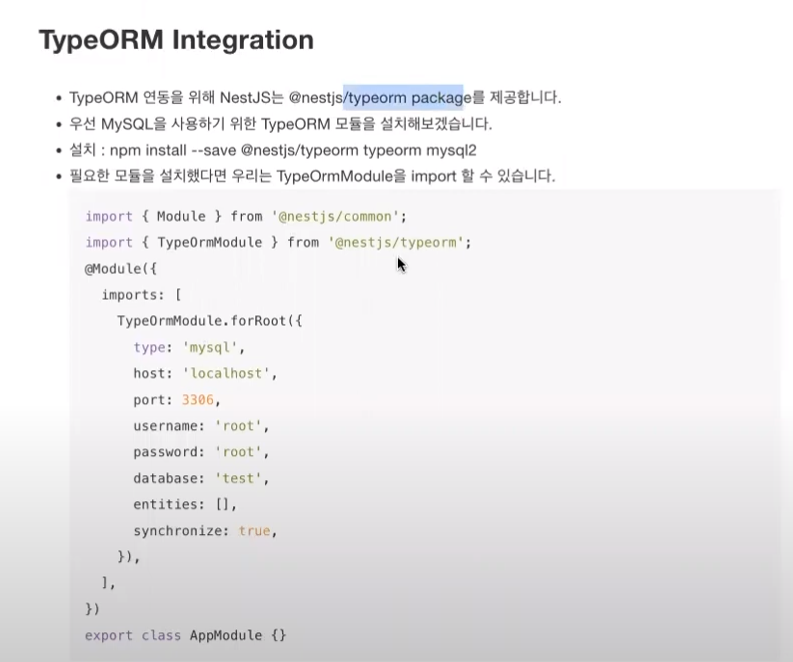
** TypeORM
: mysql이나 oracle같은 데이터베이스를 다루기 위해서는,
실제로 Query문을 작성을 해야되는데, 이러한 Query문을 함수로 대신 제공을 해서
간단하게 DB와 연동을 할 수 있는 툴
- TypeORM Integration 아래에 입력해야되는 코드 다시 작성함
* typeorm 실행 순서
터미널에서 폴더 만들기
nest new typeorm-sample
(typeorm-sample은 예시 디렉토리임)
app.module.ts에 아래 내용 추가하기
@Module({
imports: [TypeOrmModule.forRoot({
"type": "mysql",
"host": "localhost",
"port": 3306,
"username": "myname",
"password": "password1234!",
"database": "myDatabase",
entities: [],
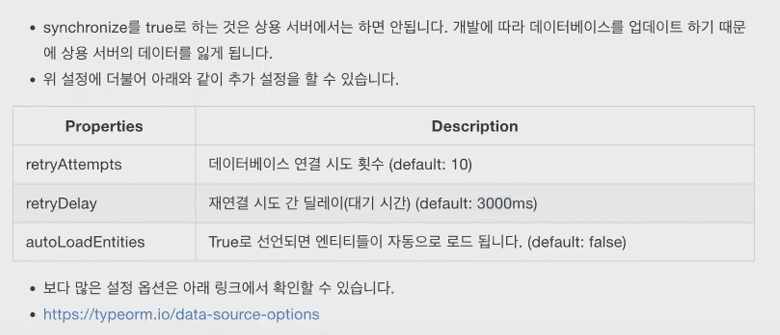
"synchronize": false, --- 상용서버에서는 true로 하면 안 됨.
}),
UsersModule, GoodsModule],
controllers: [AppController],
providers: [AppService],
})
export class AppModule {}
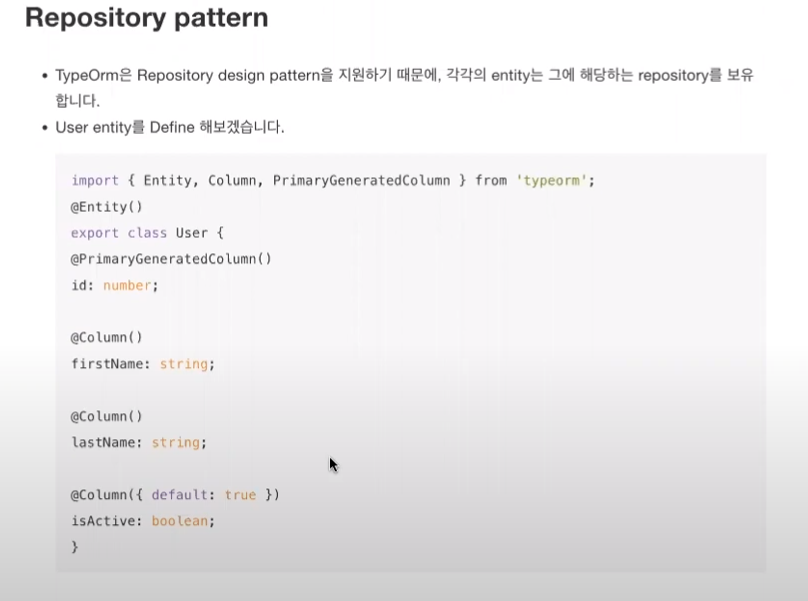
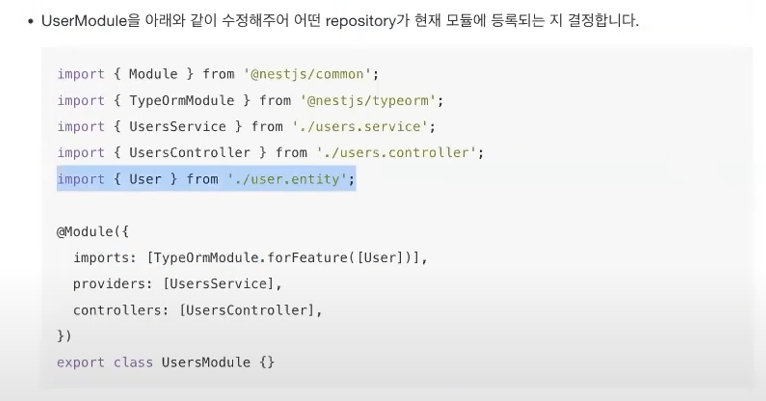
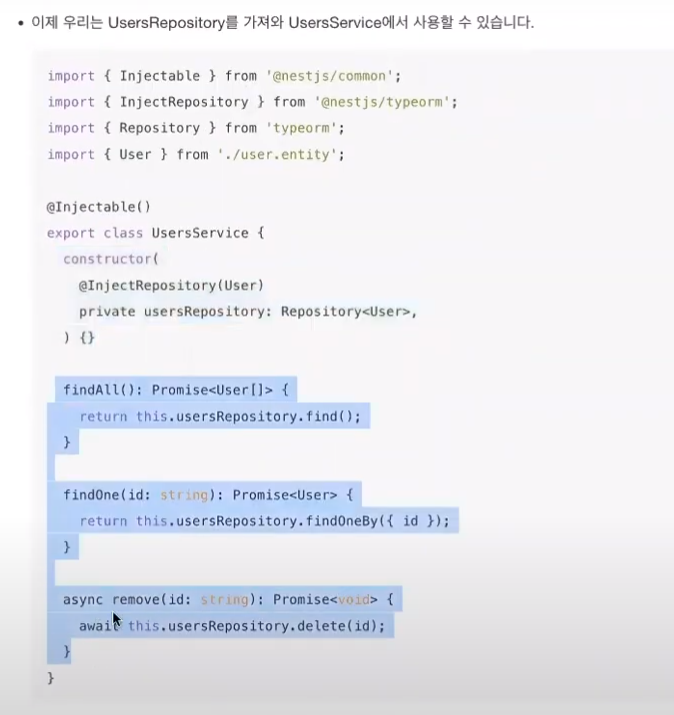
* Repository pattern (https://docs.nestjs.com/techniques/database#repository-pattern)
바로 아래에 코드는 따로 작성함
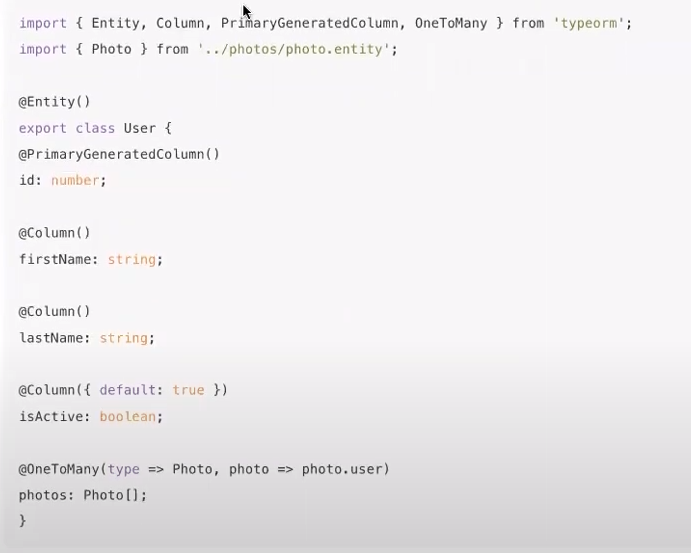
users.entity.ts 폴더를 하나 만들어서,
아래 내용들은 붙여넣기

import { Entity, Column, PrimaryGeneratedColumn } from 'typeorm';

@Entity()
export class User {
  @PrimaryGeneratedColumn()
  id: number;

  @Column()
  firstName: string;

  @Column()
  lastName: string;

  @Column({ default: true })
  isActive: boolean;
}
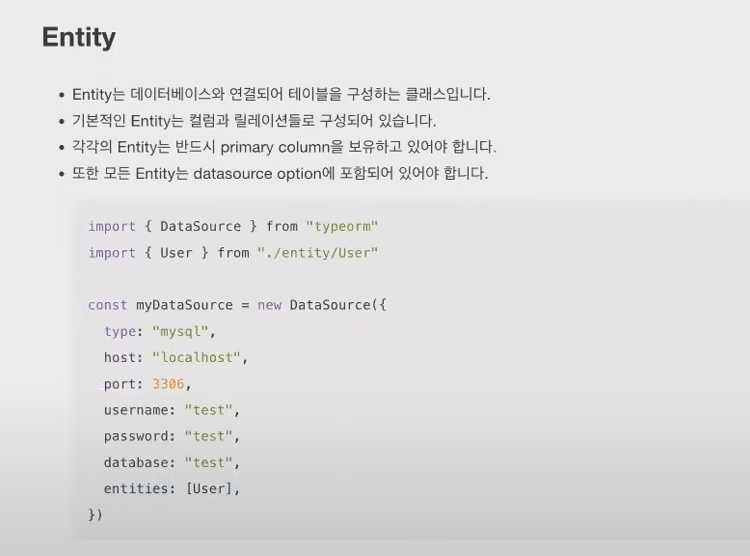
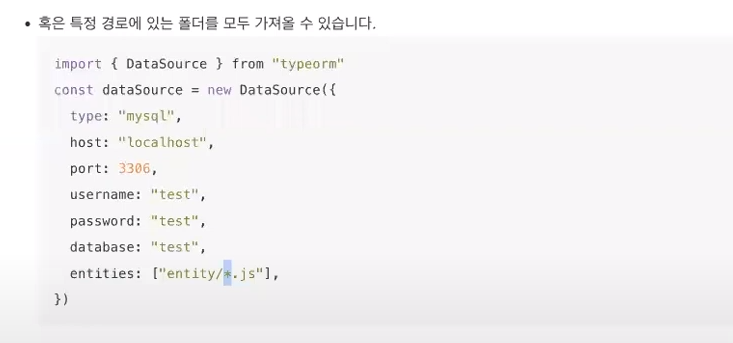
* Entity
app.module.ts의 entities: [ ] 대괄호 안에 class명 넣어주기
entities: [User]
* Mysql workbench 통해서 DB랑 연결하기
app.module.ts

import { Module } from '@nestjs/common';
import { AppController } from './app.controller';
import { AppService } from './app.service';

import { TypeOrmModule } from '@nestjs/typeorm';
import { User } from 'src/users/entities/user.entity';
import { UsersModule } from 'src/users/users.module';
import { GoodsModule } from 'src/goods/goods.module';

@Module({
  imports: [
    UsersModule,
    GoodsModule,
    TypeOrmModule.forRoot({
      type: 'mysql',
      host: 'localhost',
      port: 3306,
      username: 'root',
      password: '1234',
      database: 'nestjs-db',               --- myworkbench에 접속해서 만든 폴더 이름임
      entities: [User],
      synchronize: true,
    }),
  ],
  controllers: [AppController],
  providers: [AppService],
})
export class AppModule {}
* Entity 이어서 내용임
* App.module.ts의 entities부분에 [ User ]를 넣어주고,
users.module.ts에 import해줌으로써, user부분에서도 entity를 사용할 수 있게됨.
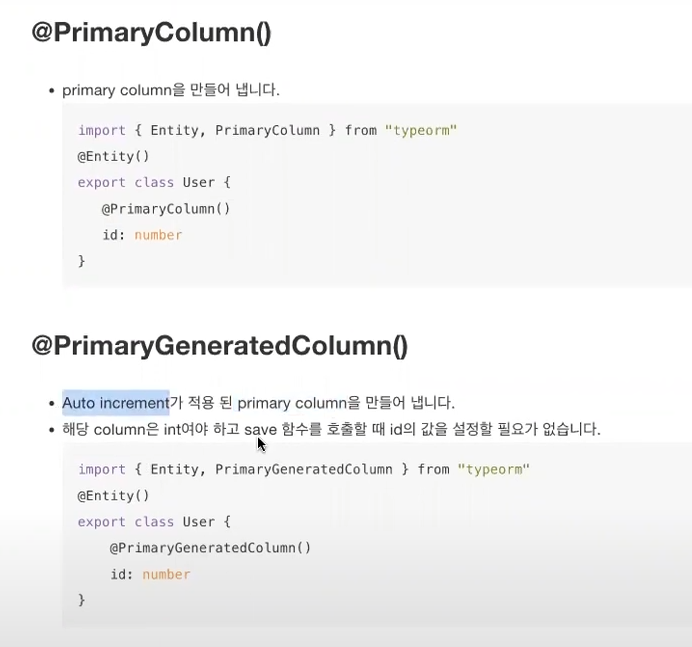
* PrimaryColumn()
Auto increment를 가장 많이 사용함
* uuid로 하고싶다면

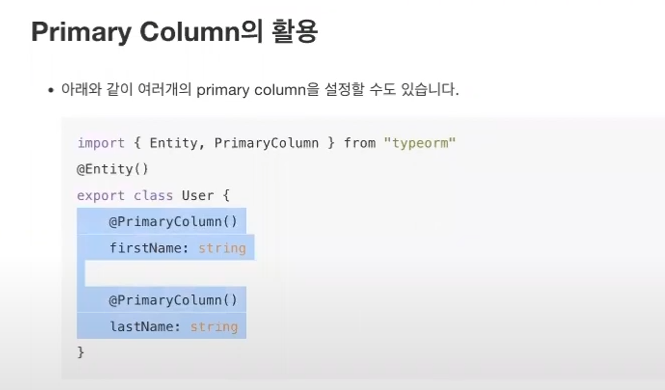
* Primary Column 활용
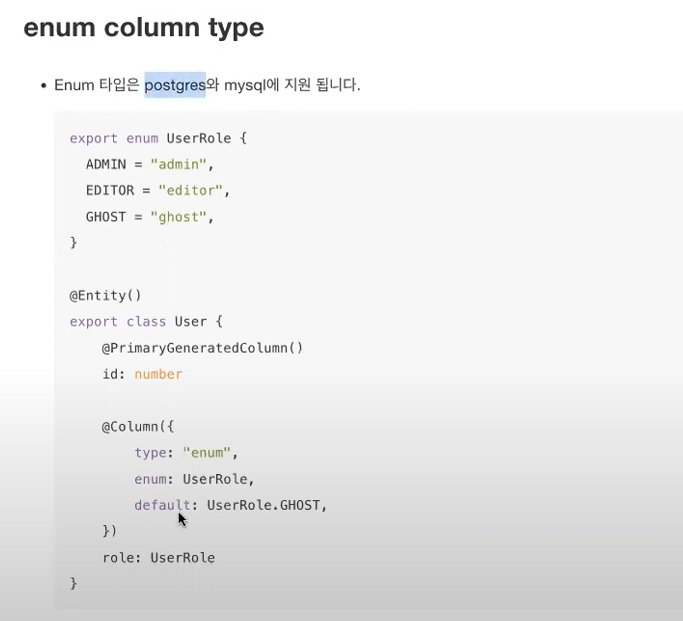
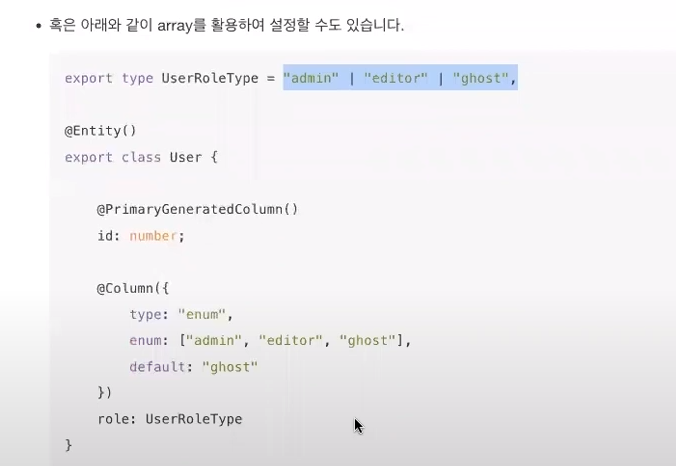
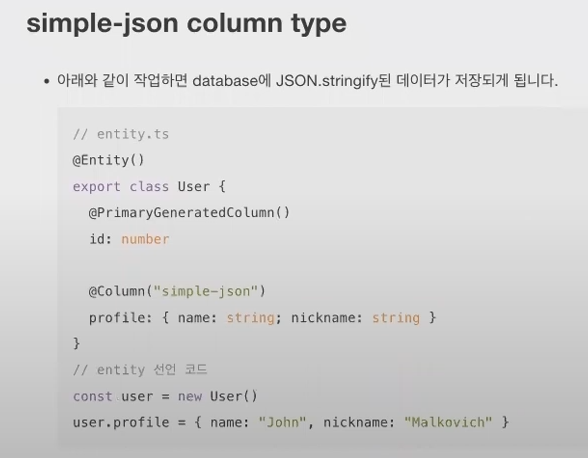
* enum column type
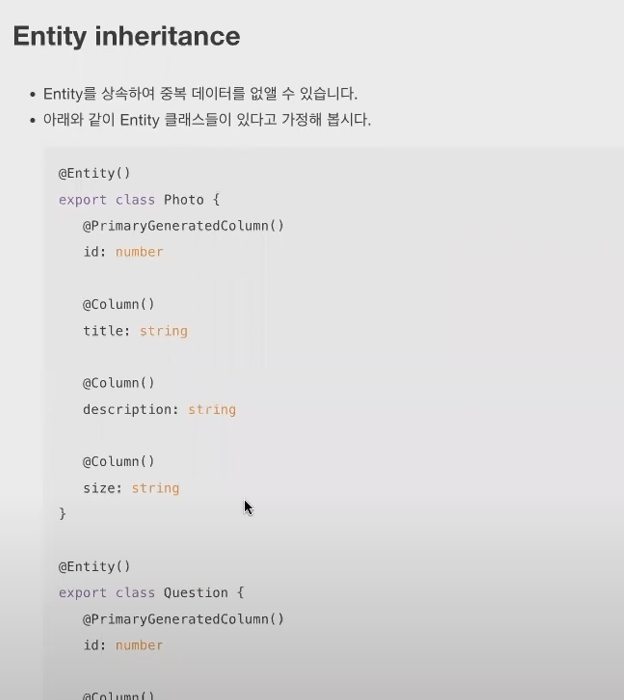
* Entity inheritance


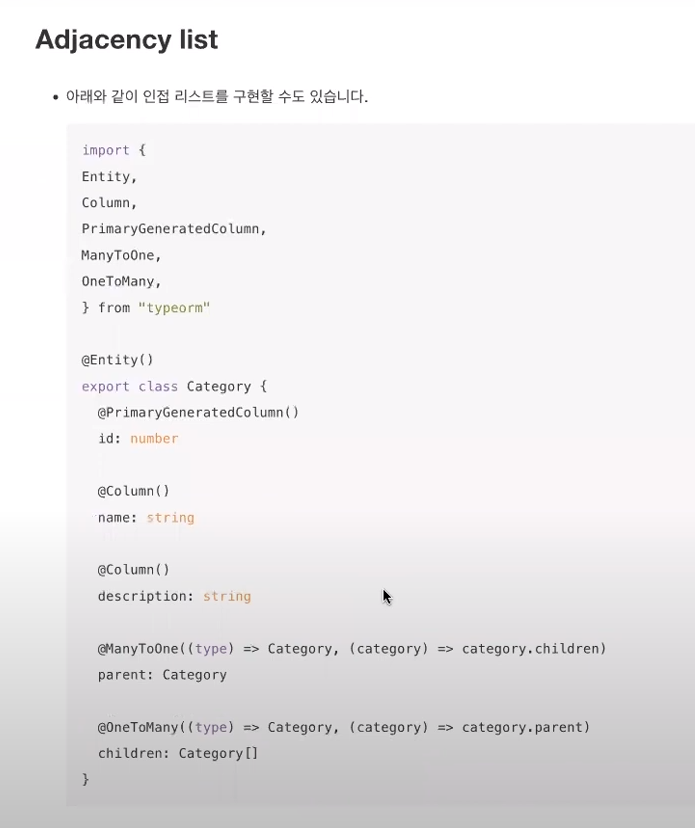
* Adjacency list
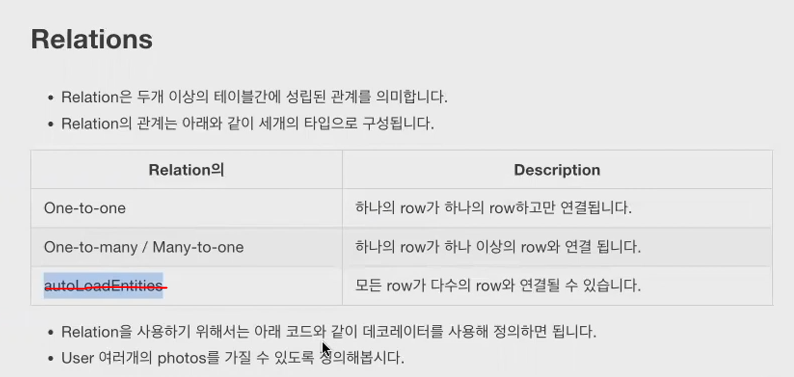
* Relations
빨간색 점선부분 many to many임
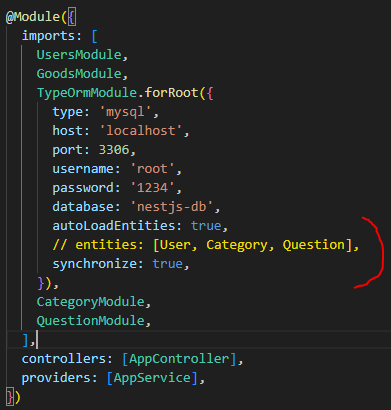
* Auto-load entites
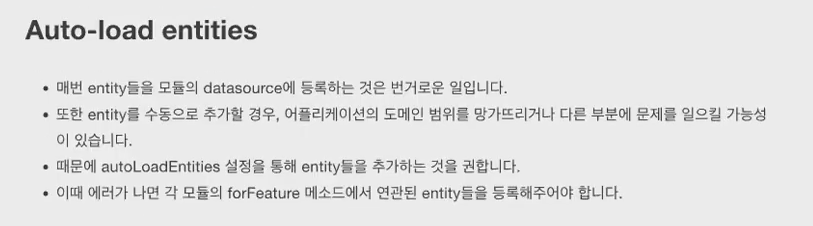
위처럼 설정을 하면, app.module.ts에서 entities: [User, Category, Question] 이런식으로 작성 안해도 자동으로 등록이 됨.
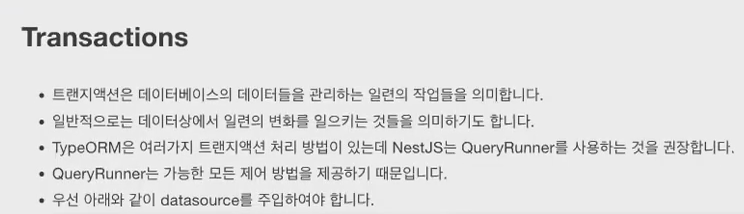
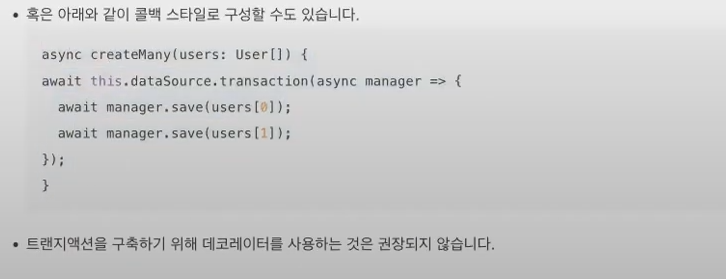
* Transactions
users.service.ts

@Injectable()
export class UsersService {
  constructor(
    private dataSource: DataSource,
  ) {}
  }
- 그 다음에는 transaction을 위한 object를 만듭니다.
users.service.ts

async createMany(users: User[]) {
    const queryRunner = this.dataSource.createQueryRunner();

    await queryRunner.connect();
    await queryRunner.startTransaction();

    try {
      await queryRunner.manager.save(users[0]);
      await queryRunner.manager.save(users[1]);

      await queryRunner.commitTransaction();
    } catch (err) {
      // since we have errors lets rollback the changes we made
      await queryRunner.rollbackTransaction();
    } finally {
      // you need to release a queryRunner which was manually instantiated
      await queryRunner.release();
    }
  }
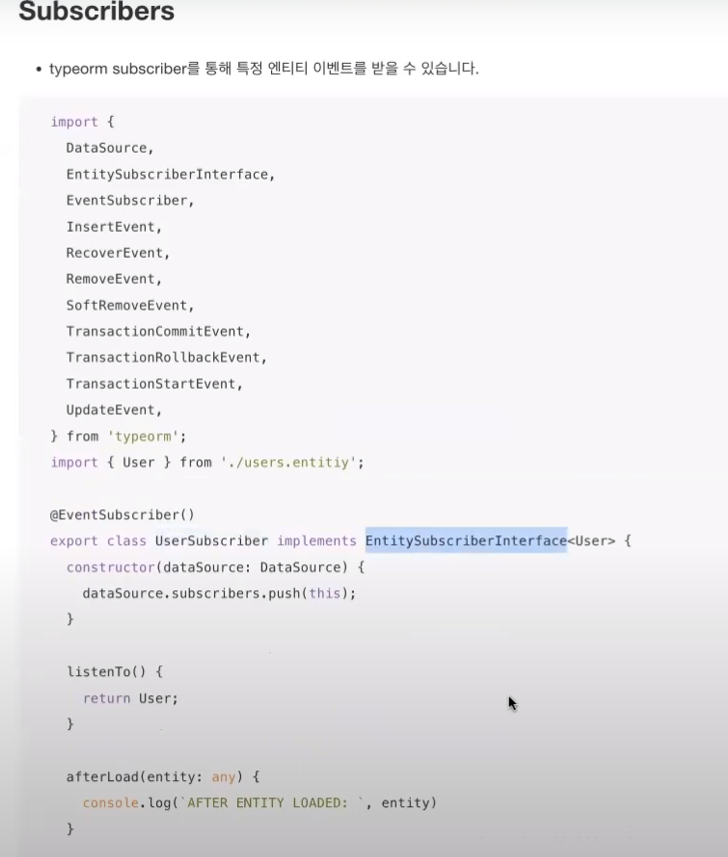
* Subscribers (section 3 / 1:03 )
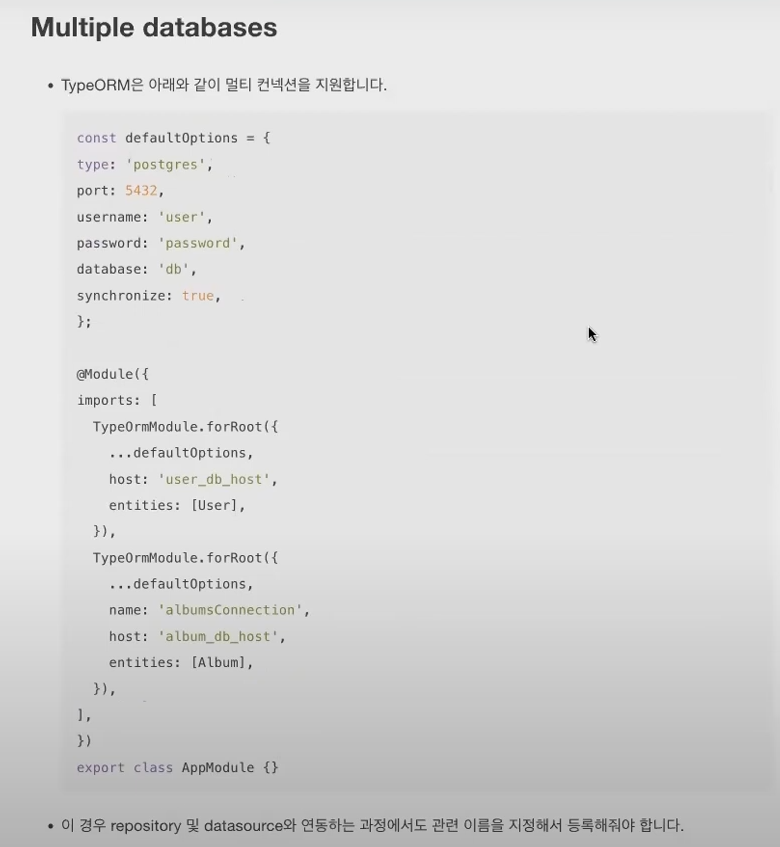
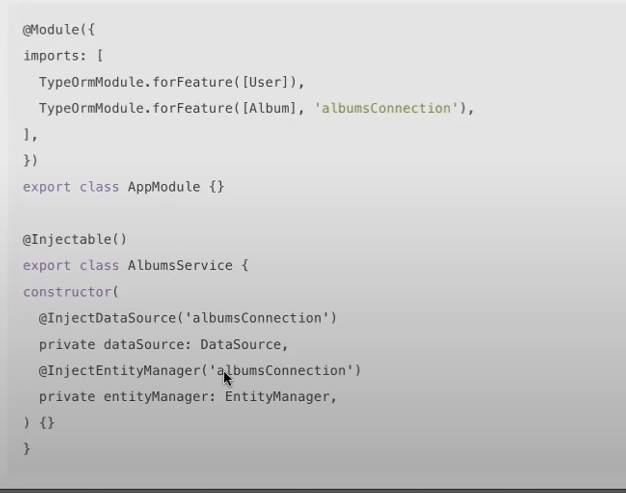
* Multiple databases
* Authentication(인증, 보안 관련)
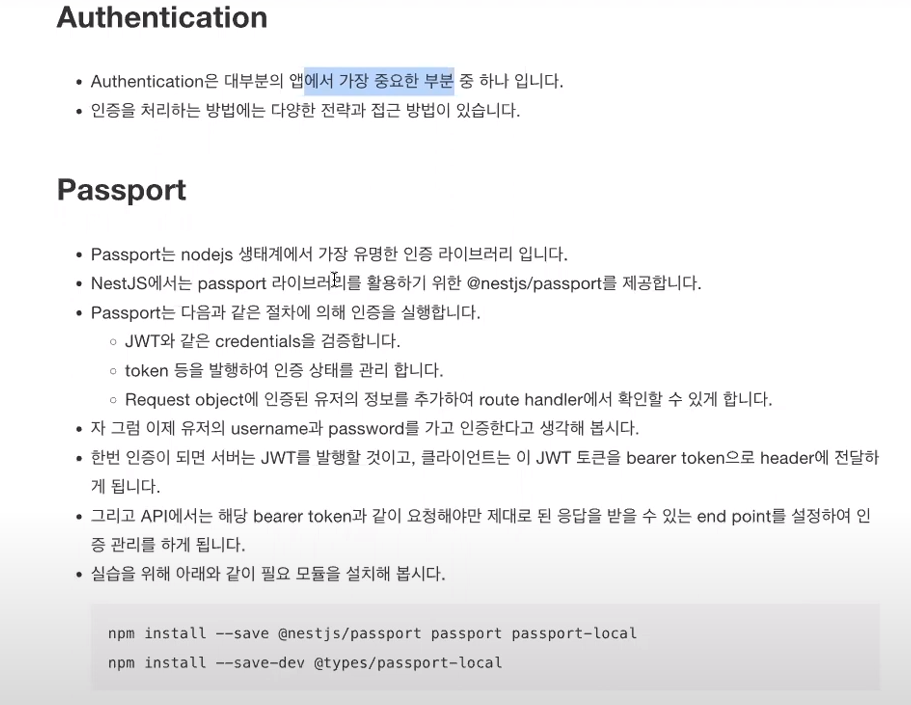
npm install --save @nestjs/passport passport passport-local
npm i --save-dev @types/passport-local
* 인증 구현
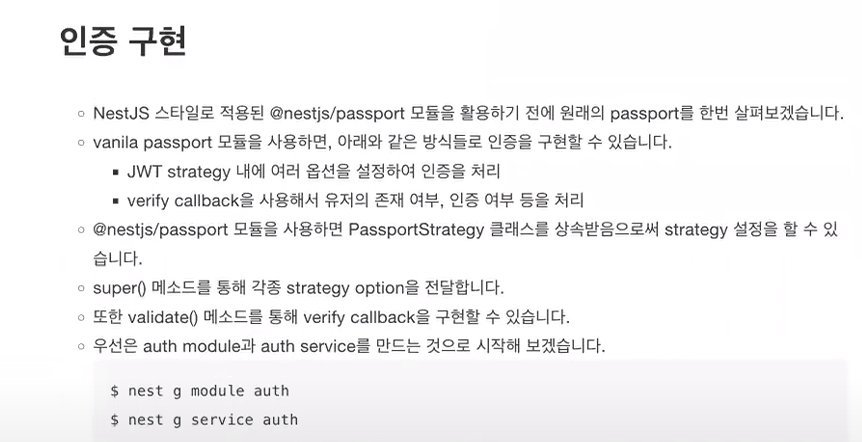
nest g module auth
nest g service auth
* user service 코드에 아래와 같은 예제 코드를 추가해보기
private readonly users [
{
 userId: 1,
 username: 'john',
 password: 'changeme',
 },
 {
 userId: 2,
 username: 'maria',
 password: 'guess',
 },
 ];

 async findOne(username: string): Promise<User | undefined> {
	return this.users.find(user => user.username === username);
}
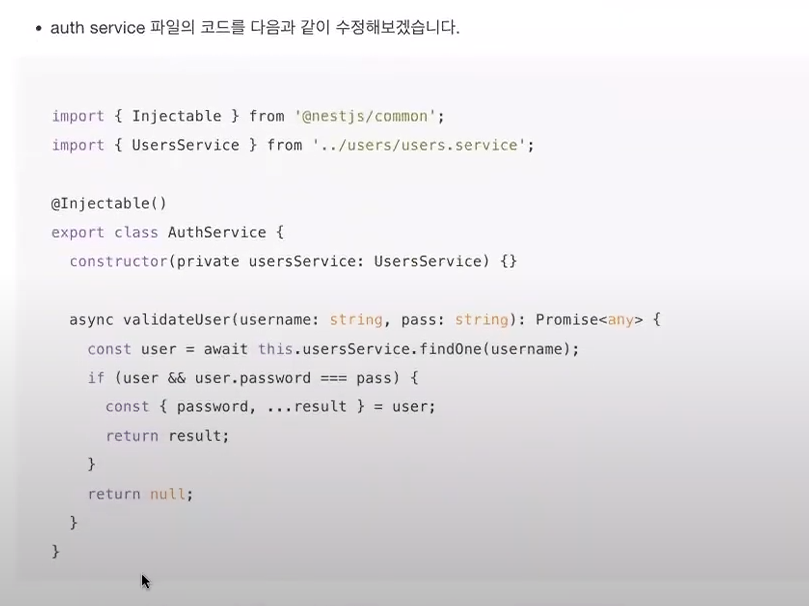
import { UsersService } from './../users/users.service';
import { Injectable } from '@nestjs/common';

@Injectable()
export class AuthService {
  constructor(private usersService: UsersService) {}

  async validateUser(username: string, pass: string): Promise<any> {
    const user = await this.usersService.findOne(username);
    if (user && user.password === pass) {
      const { password, ...result } = user;
      return result;
    }
  }
}
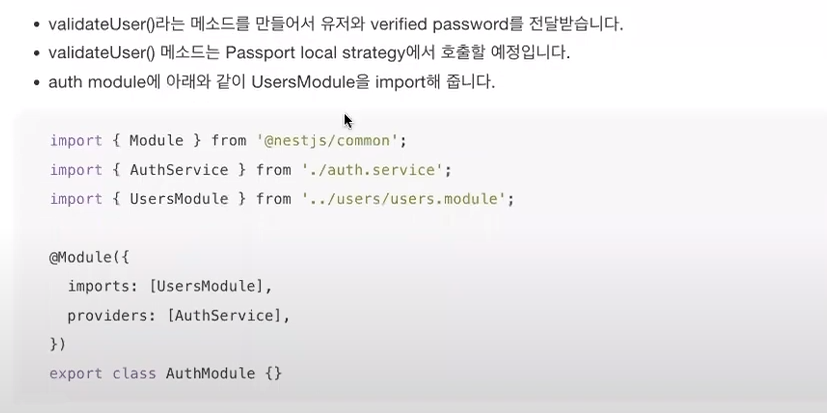
* auth. module에서
@Module({
  imports: [UsersModule],
  providers: [AuthService, UsersService],
})
export class AuthModule {}
* Passport local
import { Strategy } from 'passport-local';
import { PassportStrategy } from '@nestjs/passport';
import { Injectable, UnauthorizedException } from '@nestjs/common';
import { AuthService } from './auth.service';

@Injectable()
export class LocalStrategy extends PassportStrategy(Strategy) {
  constructor(private authService: AuthService) {
    super();
  }

  async validate(username: string, password: string): Promise<any> {
    const user = await this.authService.validateUser(username, password);
    if (!user) {
      throw new UnauthorizedException();
    }
    return user;
  }
}
* Passport local

auth/local.strategy.ts

import { Strategy } from 'passport-local';
import { PassportStrategy } from '@nestjs/passport';
import { Injectable, UnauthorizedException } from '@nestjs/common';
import { AuthService } from './auth.service';

@Injectable()
export class LocalStrategy extends PassportStrategy(Strategy) {
  constructor(private authService: AuthService) {
    super();
  }

  async validate(username: string, password: string): Promise<any> {
    const user = await this.authService.validateUser(username, password);
    if (!user) {
      throw new UnauthorizedException();
    }
    return user;
  }
}
auth/auth.module.ts
import { Module } from '@nestjs/common';
import { AuthService } from './auth.service';
import { UsersModule } from '../users/users.module';
import { PassportModule } from '@nestjs/passport';
import { LocalStrategy } from './local.strategy';

@Module({
  imports: [UsersModule, PassportModule],
  providers: [AuthService, LocalStrategy],
})
export class AuthModule {}
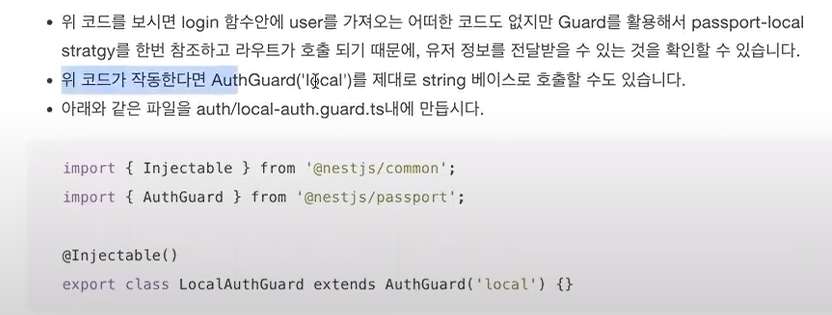
* Built-in Passport Guards

* Login route

users.controller.ts

@UseGuards(AuthGuard)
@Post('auth/login')
async login(@Request() req) {
  return req.user;
}
* 여기까지 passport와 built-in guard를 활용한 validate 코드의 기본적인 작동 방법을 알아 보았음.
* JWT
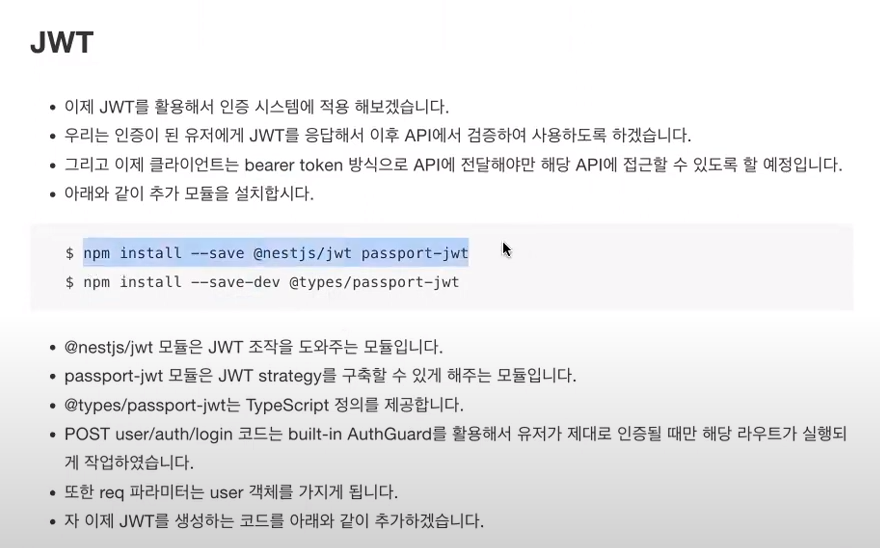
npm i --save @nestjs/jwt passport-jwt
npm i --save-dev @types/passport-jwt
auth/auth.service.ts
import { Injectable } from '@nestjs/common';
import { UsersService } from '../users/users.service';
import { JwtService } from '@nestjs/jwt';

@Injectable()
export class AuthService {
  constructor(
    private usersService: UsersService,
    private jwtService: JwtService
  ) {}

  async validateUser(username: string, pass: string): Promise<any> {
    const user = await this.usersService.findOne(username);
    if (user && user.password === pass) {
      const { password, ...result } = user;
      return result;
    }
    return null;
  }

  async login(user: any) {
    const payload = { username: user.username, sub: user.userId };
    return {
      access_token: this.jwtService.sign(payload),
    };
  }
}
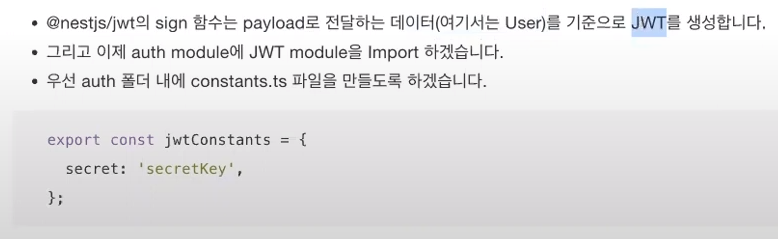
auth/constants.ts
export const jwtConstants = {
  secret: 'DO NOT USE THIS VALUE. INSTEAD, CREATE A COMPLEX SECRET AND KEEP IT SAFE OUTSIDE OF THE SOURCE CODE.',
};

auth/auth.module.ts
import { Module } from '@nestjs/common';
import { AuthService } from './auth.service';
import { LocalStrategy } from './local.strategy';
import { UsersModule } from '../users/users.module';
import { PassportModule } from '@nestjs/passport';
import { JwtModule } from '@nestjs/jwt';
import { jwtConstants } from './constants';

@Module({
  imports: [
    UsersModule,
    PassportModule,
    JwtModule.register({
      secret: jwtConstants.secret,
      signOptions: { expiresIn: '60s' },
    }),
  ],
  providers: [AuthService, LocalStrategy],
  exports: [AuthService],
})
export class AuthModule {}

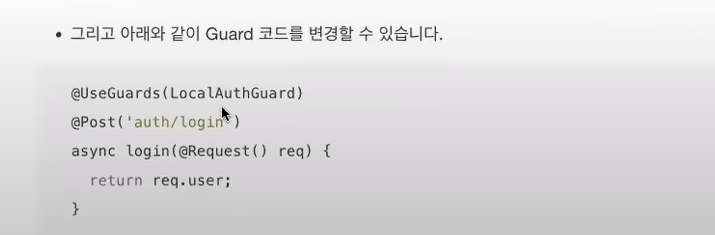
users.controller

user/auth/login route의 코드도 변경

 @UseGuards(LocalAuthGuard)
  @Post('auth/login')
  async login(@Request() req) {
    return this.authService.login(req.user);
  }
}
